

- The Status Light Tells Almost Everything
- Why Don’t Your AirPods Turn On? Common Reasons
- Battery Completely Drained
- Dirty Charging Contacts
- Faulty or Wrong Charging Cable
- Case Battery Dead, But Earbuds are Fine
- Firmware Update Interrupted During Install
- Bluetooth is Off on the Connected Device
- Audio is Routing to a Different Device
- Automatic Ear Detection Pause Everything
- Volume is at Zero
- Battery Life Ends After Long-Term Use
- Water or Moisture Damage
- Temperature Extremes
- Physical Impact Damage
- What Do I Do When My AirPods Won’t Turn On? 10 Quick Fixes
- Step 1: Charge AirPods Properly
- Step 2: Verify the Case Has Charge
- Step 3: Clean the Charging Contacts
- Step 4: Try a Different Cable and Wall Charger
- Step 5: Confirm Bluetooth and the Right Device
- Step 6: Check Automatic Ear Detection
- Step 7: Check the Volume
- Step 8: Update iPhone or Mac
- Step 9: Forget the Device and Re-Pair
- Step 10: Factory Reset AirPods
- AirPods Max: What is Different?
- AirPods Max 1st Gen (2020, Lightning Port)
- AirPods Max 2nd Gen (2024, USB-C Port):
- AirPods Still Not Turning On? Contact Apple
- Frequently Asked Questions
- Can AirPods be permanently damaged after being uncharged for too long?
- Why is only one of my AirPods not working?
- Can a dead battery on one AirPod prevent the other from turning on?
- How do I know if my AirPods have liquid damage?
- Official Sources
Wondering why my AirPods won’t turn on? Silence in AirPods is irritating, but most “dead” units are not dead at all. They’re usually drained, blocked by a dirty case contact, or frozen in the middle of a firmware update, all of which you can fix within 20-30 minutes. This guide provides troubleshooting solutions you can apply to any AirPods model to get them working again.
Editorial & Testing Disclosure
Tested on: AirPods 2nd Gen, AirPods 3rd Gen (Lightning case), AirPods Pro 2nd Gen (USB-C case)
Software: iOS 18.3.2, iOS 18.4, macOS Sequoia 15.4
Note: Each fix in this guide was verified across the models listed above. Steps for AirPods Max and AirPods Pro 1st gen are based on Apple’s official support documentation and community-verified reports, noted where applicable.
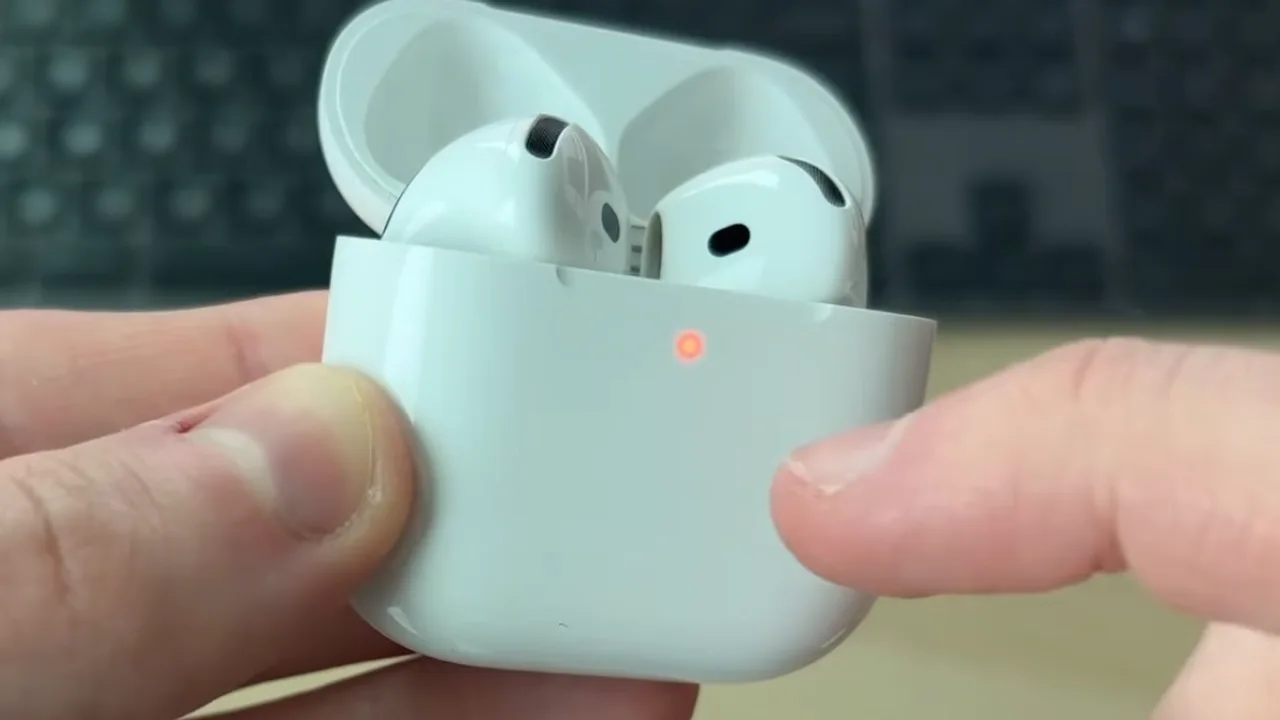
The Status Light Tells Almost Everything
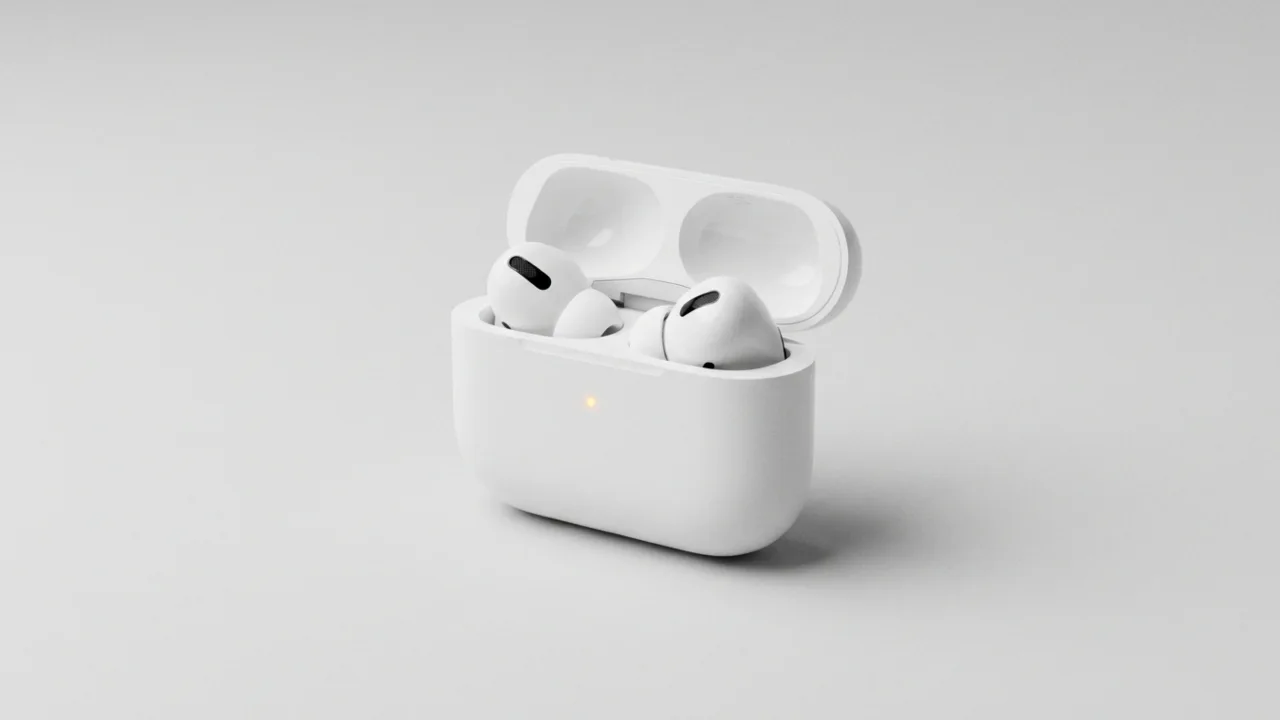
The amber pulse on the charging case tells whether the battery is flat, the earbuds have lost their link, or a reset is required. Most users overlook that flash or mistake its rhythm for a fault they can’t diagnose. Knowing the pattern cuts the guesswork and makes it quick to resolve the AirPods not turning on problem.
Related: Can You Connect AirPods to PS5?
| Status Light | Case Closed | Case Open |
|---|---|---|
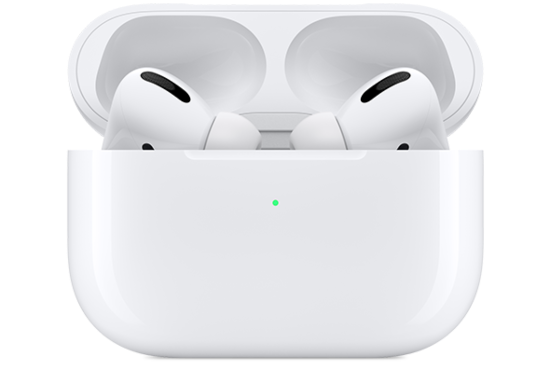
| Solid Green | Case is fully charged | AirPods are completely charged |
| Solid Amber | Case has under one full charge remaining | AirPods need charging |
| Flashing White | Not applicable | Charging case is in pairing mode, ready to connect |
| Flashing Amber | Not applicable | Pairing error. A reset is needed. |
| No Light | Battery completely drained | Battery completely drained |
If the charging case light doesn’t flash after you plug it in, wait 15‑20 minutes. A completely drained case sometimes needs that long to collect enough charge to power the LED.
Why Don’t Your AirPods Turn On? Common Reasons
The reality stretches far beyond the shortlist of a few culprits, and many of these factors can slip past a quick visual check, leaving the user baffled while the earbuds remain mute. Here are all the possible reasons we’ve identified why AirPods might not turn on.
Battery Completely Drained
AirPods left in a drawer, a bag, or a car for weeks will go into deep discharge. The battery is not dead and can usually be recovered, but it must first build up some voltage to wake the earbuds or the case. So, plug in and wait at least 30 minutes, then try to turn on.
Dirty Charging Contacts
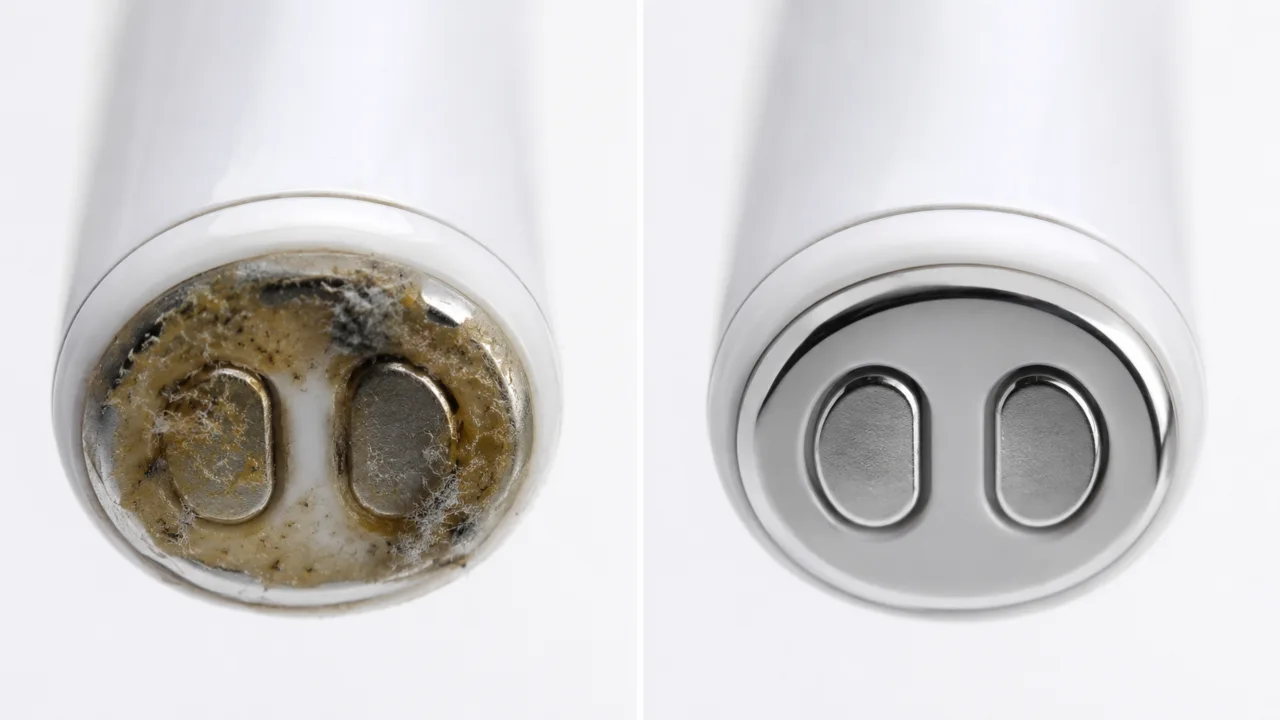
Flat metal pads crown each earbud’s stem, pressing against pins inside the case wells to draw power. Over time, earwax, pocket lint, dust, and skin oil accumulate on these contacts. The film is invisible to the eye, yet it interrupts the circuit, and this is probably the most underestimated cause of charging failures.
Faulty or Wrong Charging Cable
A frayed Lightning tip can render an iPhone charger useless in weeks. Inside the connector, each insertion forces the pins to bend, snapping the copper strands while the sheath stays immaculate. The damage will be invisible until a low‑power device, such as an AirPods case, registers erratic charging. Even cables that power a phone flawlessly may deliver inconsistent current to the case because a small draw can hide the intermittent connections.
AirPods models are split across two connectors. AirPods 1st gen, 2nd gen, 3rd gen (original case), AirPods Pro 1st gen, 2022 AirPods Pro 2, and 2020 AirPods Max all charge via Lightning. AirPods 4 (both standard and ANC), AirPods 3rd gen with the newer USB-C case, AirPods Pro 2 from late 2023 onwards, and AirPods Max 2024 all use USB-C.
Case Battery Dead, But Earbuds are Fine
The case and AirPods have separate batteries. Your headsets might have remaining charge, but the case is dead, which means the AirPods cannot pair, connect, or respond to your device properly.
Firmware Update Interrupted During Install
Firmware updates for AirPods install automatically when they are charging near a paired iPhone. If this process is interrupted, maybe the phone drifts out of range, or the case runs out of power, AirPods can become unresponsive. In such cases, performing a factory reset is the necessary solution to restore functionality.
Bluetooth is Off on the Connected Device
Bluetooth not enabled on the source device is a common blind spot. After a phone restart or a software update, the Bluetooth toggle can revert to off, leaving the AirPods unable to turn on because there’s no device to connect to.
Audio is Routing to a Different Device
In case you have multiple Apple devices, your AirPods have probably connected to a different one. The earbuds are on, the connection is alive, but the sound is being routed elsewhere, a frequent cause of dead AirPods complaints.
Related: Can You Connect AirPods to PS4? If Yes, Then How
Automatic Ear Detection Pause Everything
AirPods with Automatic Ear Detection stop audio playback the instant they are removed from the ears. Occasionally, however, a software glitch or sensor fault can cause the earbuds to incorrectly register as being out of your ears, even when they are inserted. In this case, the hardware works, but the sensor fails.
Volume is at Zero
Check the volume. AirPods have independent volume controls that can be lowered by Siri, an accidental press, or from accessibility settings. If your earphones seem paired and responsive yet emit no sound, the mute is often the simplest explanation.
Battery Life Ends After Long-Term Use
Battery wear is inevitable. Apple rates AirPods to hold about 80% of their original capacity after roughly 500 full charge cycles, typically two to three years of daily use. Beyond that, the cells can degrade to the point where they cannot hold enough charge to power AirPods despite charging. The remedy is Apple’s battery service, not a full replacement.
Water or Moisture Damage
AirPods will survive a splash, but a sudden downpour or a tumble into a kitchen sink can damage them. Their IPX4 rating only guarantees protection against light splashes; rain, submersion, and steam can still breach the seals. Water corrodes the internal contacts and circuitry, often not visible from outside. If your AirPods don’t turn on after exposure to moisture, that context is important for diagnosis.
Temperature Extremes
Cold weather drains the lithium‑ion batteries inside AirPods faster than a mild day. In sub‑zero temperatures, the battery may appear dead even though juice is left, simply because it cannot deliver power at that temperature. Warm the charging case to room temperature and try again before assuming a hardware problem.
Physical Impact Damage
A hard drop onto concrete or a tile floor can damage internal connections. The battery and circuit board are far more fragile than the outer casing. If your AirPods stopped working shortly after a fall, it’s very likely due to impact damage.
What Do I Do When My AirPods Won’t Turn On? 10 Quick Fixes
Even if your AirPods aren’t responding, they are not necessarily broken. Before assuming the worst, try these troubleshooting methods to get them working again.
Step 1: Charge AirPods Properly
Put both earbuds in the charging case, close the lid, plug the case into a wall outlet, and wait at least 30 minutes. A laptop USB port or a power bank won’t deliver enough current, and a deep‑discharge case often will not even light the LED at low amperage.
After half an hour, lift the lid. If nothing blinks, the battery is probably still charging, not broken.
If your case supports MagSafe or Qi wireless charging, using a charging pad is a good way to rule out a faulty cable. Wired is fast for a depleted case, but wireless charging eliminates the cable as a variable if you are not sure about your cable’s condition.
Step 2: Verify the Case Has Charge
Remove the AirPods from the case, keep the case on the wall charger, and watch the status light. Solid green means the case holds at least one full charge, solid amber means it’s low and no light after 15-20 minutes of solid connection points to either a dead case battery or a damaged charging port.
Separating the case test from the earbuds is useful—most failures involve one or the other, not both. If the earbuds react when placed in the case but show no charge, you now know where the problem lies.
Step 3: Clean the Charging Contacts
Inspect the metal pads at the base of each earbud and the pins inside the case’s charging wells (the contact points that transfer charge from the case to AirPods). Any film or lint will stop the current flow.
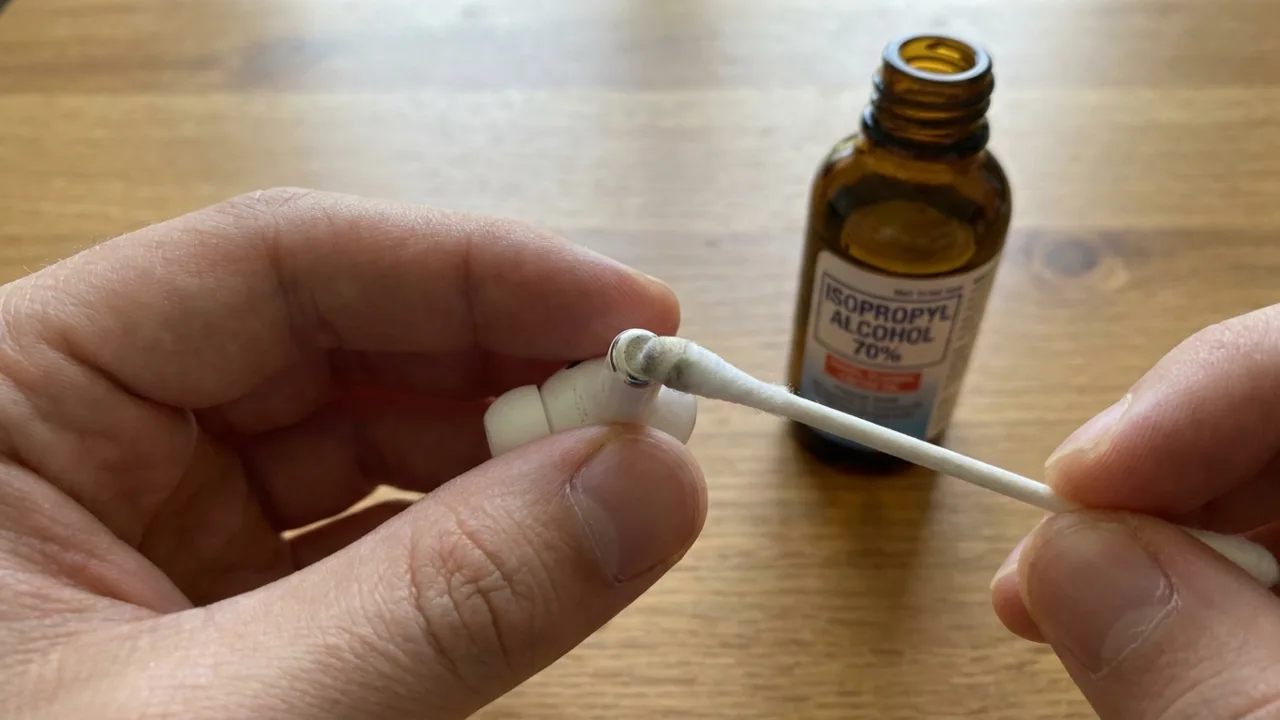
Wipe the pads with a dry, lint‑free cloth or a soft brush, such as an unused toothbrush. Rub the metal pads on each bud in a small circular motion. Stubborn grime can be lifted with a cotton swab barely dampened with 70 % isopropyl alcohol, then let everything dry completely before placing the AirPods back in the case.
Never spray liquid directly into the case wells. The internal circuitry is just below the surface, and any excess moisture can cause corrosion and void the warranty. Bear in mind that AirPods are rated for splash resistance only, not for immersion or direct liquid contact.
Once clean, seat the earphones back in the case and feel the magnetic click as each snaps into place. If any feel loose and fail to click, something is obstructing the well. Point a flashlight into the cavity, so the beam reveals debris invisible under normal light.
Step 4: Try a Different Cable and Wall Charger
Change the cable and wall adapter. A third‑party Lightning cord often frays inside after a few months of regular use, and even an original Apple cable can lose its grip after a year. Use a wall charger rather than a USB port on a computer. Hubs and old laptop ports, in particular, can supply insufficient current for a depleted battery to revive.
If you can borrow a compatible AirPods case from someone, place the buds inside it and check if they charge in that case. If not there either, it means the AirPods have an issue.
Step 5: Confirm Bluetooth and the Right Device
Make sure Bluetooth is enabled on your paired iPhone, iPad, or Mac. On an iPhone, go to Settings > Bluetooth; on a Mac, open the menu‑bar Bluetooth icon or System Settings. Verify that the AirPods appear in the list of connected devices, then confirm they’re the selected audio output.
On iPhone, swipe down to open Control Center, press and hold the audio widget, and tap the AirPlay icon. This shows every available audio output and which one is currently active. If your AirPods are connected but audio is going to the iPhone Speaker or another device, tap your AirPods name to switch. On Mac, open Control Center or click the volume icon in the menu bar, then choose the AirPods from the output list.
Related: AirPods Microphone Not Working? Here’s How to Fix
Step 6: Check Automatic Ear Detection
Put both AirPods in your ears and see if you can listen to audio. If it does, the earbuds were never powered off but were paused because the sensor misread the situation.
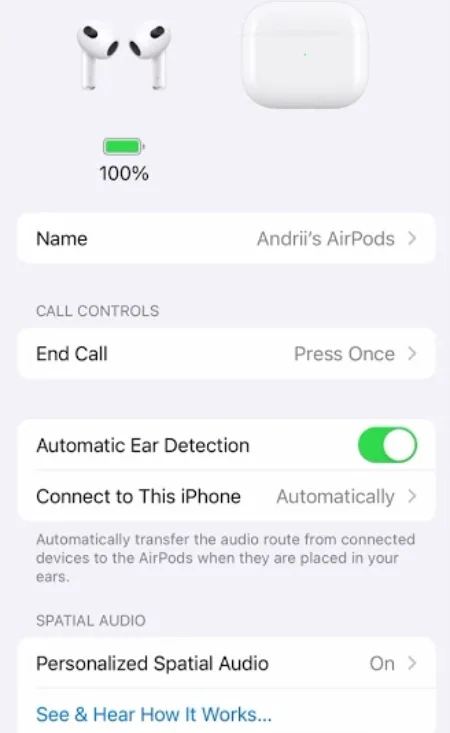
To reset the setting, open Settings > Bluetooth, tap the “i” next to the AirPods, and find Automatic Ear Detection. Turn the toggle off and on again if it’s already enabled, as the reset can clear a stuck sensor.
Step 7: Check the Volume
Increase the volume on your device while the AirPods are connected, then ask Siri to raise it. Apple assistant can also adjust the volume and sometimes accidentally drag it down again. To manually change sound level, press the force‑sensor stem on AirPods Pro, or use the stem controls on AirPods 4.
Step 8: Update iPhone or Mac
AirPods firmware installs automatically when the headphones are charging near a paired iPhone, but an interrupted install can leave them stuck. Refreshing the Bluetooth stack by updating the host device frequently clears the blockage.
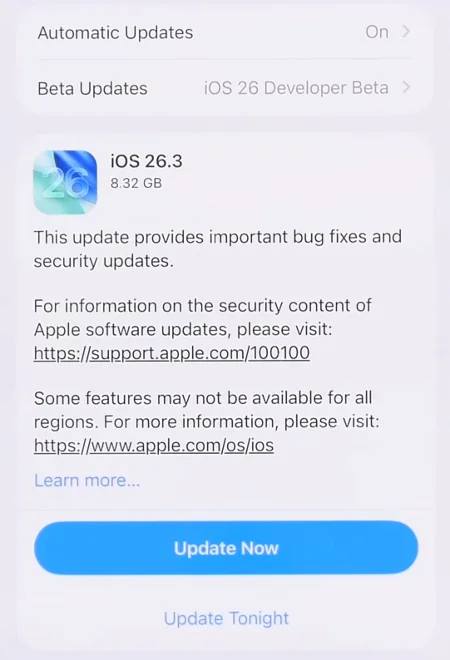
On an iPhone, open Settings > General > Software Update. On a Mac, click System Settings > General > Software Update. After the update, place the AirPods in their case, lid open, beside the iPhone, and leave them for 30 minutes so any pending update can finish.
Connect the AirPods to the iPhone, go to Settings > Bluetooth on the phone, tap the “i” next to the AirPods name, and scroll to the About section. Apple does not publish official changelogs for these updates.
Step 9: Forget the Device and Re-Pair
By removing your AirPods from the device’s Bluetooth history and pairing them again, you can clear out any corrupted connection data without erasing the AirPods’ internal settings.
On an iPhone:
- Open Settings > Bluetooth.
- Tap the info (i) icon next to the AirPods.
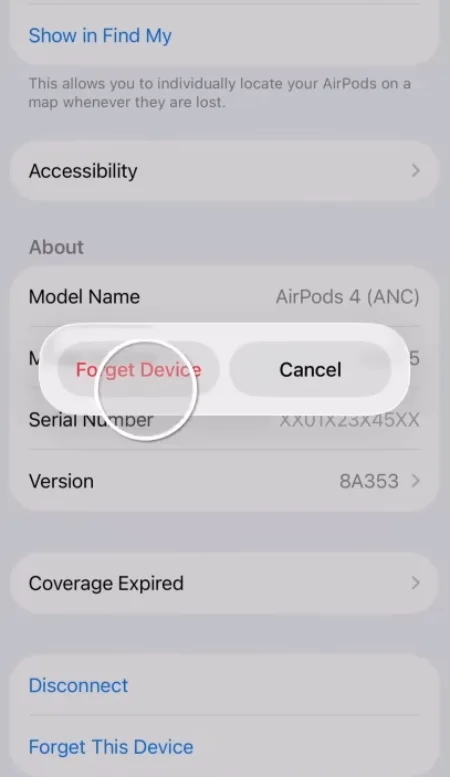
- Choose Forget This Device.
- Hold the case open next to the phone, and a pairing prompt will appear on the screen.
On a Mac:
- Open System Settings > Bluetooth.
- Click the info (i) icon or the X next to the AirPods.
- Select Forget This Device.
- Place the open case near the Mac, then press the setup button on the charging case back to enter pairing mode.
Step 10: Factory Reset AirPods
If none of the above methods fix the AirPods startup issue, perform a factory reset. The reset wipes every Bluetooth pairing from the AirPods and restores the firmware to a clean state, leaving hardware issues as the only remaining possibility.
A factory reset removes your AirPods from every device they were previously paired with, including your iPhone, iPad, Mac, Apple Watch, and Android. If you are signed in to an Apple device with an iCloud account, re-pairing with one device will automatically sync it across your other Apple hardware. For non-Apple devices like Android phones or Windows PCs, you will need to manually re-pair the earbuds from scratch.
Here’s how you can factory reset any AirPods model:
- AirPods (1st-3rd gen), AirPods Pro (1st-2nd gen): With the case lid open, press and hold the setup button on the back of the case for 15 seconds until the status light flashes amber, then turns white.
- AirPods 4th gen (all models): With the charging case lid open, double-tap the front of the case three times until the status light flashes amber, then white.
AirPods Max: What is Different?
AirPods Max stand apart, so they deserve their own rundown. There’s no charging case with contact pins, no setup button on the back of a case, and the LED is on the headband.
AirPods Max 1st Gen (2020, Lightning Port)
If the earbuds are unresponsive, plug a Lightning cable into the right ear cup and charge for at least half an hour. The Smart Case that ships with the AirPods Max merely puts the headphones into low‑power storage, never charges them.
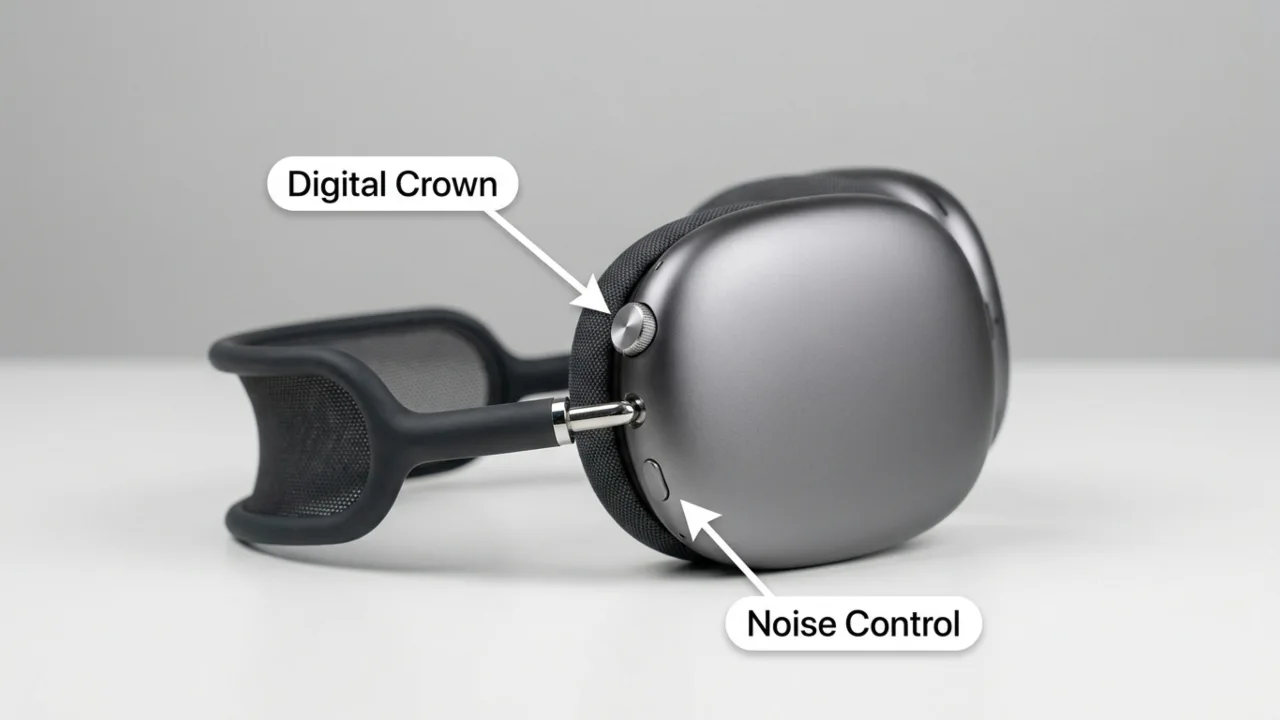
To reset, press and hold the Noise Control button and the Digital Crown together for 15 seconds. When the LED flashes amber, then white, let go. AirPods Max have now been reset and are ready to pair.
AirPods Max 2nd Gen (2024, USB-C Port):
The reset process is similar to the 1st gen. Hold Noise Control + Digital Crown for 15 seconds until the amber‑white flash sequence, then release. The only change is the charging socket—USB‑C replaces Lightning, positioned in the same place on the right ear cup.
AirPods Still Not Turning On? Contact Apple
AirPods won’t power up? It’s almost certainly a hardware failure. That usually means one of three things: the battery cells have failed and cannot accept a charge, water has corroded the internals, or a drop has cracked a circuit. Don’t try to fix your expensive AirPods at home because the case and buds are sealed with adhesive, and prying them open can destroy the gadget.
- If your AirPods are under one year old and the problem is not from accidental damage, Apple’s limited warranty covers repair or replacement free of charge. Check your warranty coverage status at checkcoverage.apple.com, then visit a store or open a support ticket.
- AppleCare+ adds accidental‑damage coverage—including spills—for a modest service fee per incident and also covers battery wear once capacity falls below 80%. Prices show when you start the support request and vary by model and region.
Without warranty or AppleCare+, Apple charges per unit serviced. You can replace a single earbud, the charging case, or both, instead of buying a whole new pair. Current out‑of‑warranty prices for every AirPods model are listed at support.apple.com/airpods.
Frequently Asked Questions
Can AirPods be permanently damaged after being uncharged for too long?
A fully discharged AirPod left idle for months can enter a state where they stop accepting a charge. Give them a full hour on a wall charger, and if there’s still no response after an hour, Apple service can confirm whether the cells can be revived.
Why is only one of my AirPods not working?
If your left or right AirPod isn’t working, start with its charging contact. Clean the tip, make sure it clicks firmly into the case, then do a factory reset. Should it remain mute, the battery in that pod is probably more worn than its mate. Apple will replace a single earbud when that’s the only fault. Also, verify the stereo‑balance slider in Settings > Accessibility because a shifted balance can masquerade as a dead pod.
Can a dead battery on one AirPod prevent the other from turning on?
One dead bud does not drain the other, as both units have their own power rail and processor. A short inside a faulty pod can jam the case’s controller, briefly stopping the companion from registering until the shorted unit is removed.
How do I know if my AirPods have liquid damage?
To spot liquid damage, examine the silver acoustic mesh and microphone ports. Standard AirPods lack an external liquid‑contact indicator, but corrosion often appears as crusty green or white residue around the lower charging rings or within the case contacts.
Official Sources
My AirPods don’t turn on
How to reset your AirPods and AirPods Pro
If your left or right AirPod isn’t working
If your AirPods won’t charge
Did this fix your issue?
Let us know. Your feedback helps other readers find the right solution.
Great! What solved it for you?
We read every response. Email is optional and never shared.
Sorry to hear that. What happened when you tried?
Leave your email and we will personally help you fix it.


