

- Common Reasons for AirPods Microphone Not Working
- How to Fix AirPods Microphone That Won’t Work
- 1. Confirm the Device Uses AirPods Mic
- 2. Check AirPods Battery Levels
- 3. Put AirPods Back in the Case
- 4. Toggle Bluetooth Off and On
- 5. Test One AirPod at a Time
- 6. Toggle Automatic Ear Detection
- 7. Clean AirPods Microphone Mesh
- 8. Turn Off AirDrop
- 9. Update Your Phone & AirPods
- 10. Forget AirPods and Re-Pair
- 11. Reset Network Settings on iPhone
- 12. Factory Reset AirPods
- Contact Apple Support
AirPods will connect and stream sound fine, but the person on the other end of the call hears nothing from you. Or you open Voice Memos, record a clip, hit play, and get only silence. Before you write off your Apple buds as broken hardware, remember that true mic failure is rare. AirPods are dependable wireless earbuds, yet microphone dropouts are a common issue reported across generations from the original AirPods to the latest AirPods Pro and AirPods 4.
When your AirPods mic is not working, it’s seldom due to permanent damage. Most of the time, it’s a software hiccup, a software conflict, a temporary Bluetooth desync, an incorrect setting, or the accumulation of pocket lint and debris blocking the acoustic ports. Read on to learn about the common reasons for AirPods microphone problems and what you can do to fix them.
Manually select AirPods as the audio source during calls. If it doesn’t solve the problem, toggle Bluetooth off and on, check battery levels, and carefully clean the microphone mesh. Should issues continue, test one AirPod at a time, update iOS and AirPods firmware, then re-pair or factory reset. Contact Apple Support only after all software troubleshooting options are tried.
Common Reasons for AirPods Microphone Not Working
Here are the actual causes ranked by how frequently they normally happen, based on user reports across communities, tech forums, and documented iOS behavior:
- Wrong audio routing: The phone ignores AirPods and uses its mic for calls or in apps.
- Blocked mic mesh: Earwax, lint, and skin oils build up over the mic opening and muffle or silence it.
- Bluetooth glitch: A temporary audio stack error that a reconnect clears.
- Low battery: Mic reliability drops when an AirPod’s charge falls below about 10%.
- Automatic mic switching stuck: The auto left/right switching fails and drops audio.
- Outdated iOS or AirPods firmware: Known bugs in old versions affect mic routing.
- Corrupted pairing data: Stored Bluetooth connection info has errors that require a complete re-pair.
- Hardware failure: Physical, water, or impact damage to the mic element.
Related: Why Won’t My AirPods Turn On? Here’s How to Fix
How to Fix AirPods Microphone That Won’t Work
If you are experiencing microphone issues with your AirPods, follow these troubleshooting steps to investigate and resolve this problem:
1. Confirm the Device Uses AirPods Mic
You’d think your AirPods control everything once they’re connected and playing audio, but iOS might still be routing calls and recordings through the phone’s built-in mic instead. Silent switch, basically. And your AirPods stay connected in the background the whole time.
Third-party apps are especially guilty here. WhatsApp, Zoom, Discord, and Instagram all default to the phone mic in many situations unless you manually switch the audio source inside the call.
- For regular phone calls: When on the call, tap the Audio button (the speaker icon at the bottom of the screen), then pick AirPods from the displayed menu.
- In third-party apps: Look for an audio or device icon in the call interface. Tap it, and select your AirPods as the active microphone, then have the other person confirm they can hear you now.
Quick way to test the mic: Open Voice Memos app with your AirPods in, tap the red button to record, say something for a few seconds, stop, and play it back. If your voice comes through clear and it sounds like you’re right next to the mic, it’s working, and the problem is with the specific app. If the playback is silent or your voice sounds distant and flat like the phone mic, continue working through the fixes below.
These steps apply to iPhone and iPad (iOS/iPadOS), but the same logic works for Mac, Android, and Windows. No matter what device you’re on, the fix is pretty much the same: open audio settings, find the input device picker, and choose AirPods.
2. Check AirPods Battery Levels
Have you ever noticed your AirPods acting weird? A very low battery not only reduces playback time. When either AirPod’s charge drops below around 10%, the microphone starts acting up before it completely dies. Further, one earbud might be way more drained than the other, affecting the mic of that side.
To check, hold the AirPods case near your iPhone, open the lid, and the battery pop-up will show both buds’ charge plus the case. If anyone is below 20%, fill the juice before you continue troubleshooting. You can also add the Batteries widget to your iPhone home screen for a glance.
Once AirPods are at least 50% charged, run another Voice Memos test to see if the issue is gone.
3. Put AirPods Back in the Case
Place both AirPods in the case, close the lid, wait 30 seconds, take them out, and put them back in your ears. This small workaround forces a complete restart and re-initializes the Bluetooth audio connection from scratch. Takes less than a minute, and it can solve a lot of mic weirdness, particularly after wearing them for hours when the connection has drifted into an odd state.
Related: How to Connect AirPods to PS5
4. Toggle Bluetooth Off and On
iOS controls Bluetooth audio through multiple layers, and sometimes it’ll route playback fine but forget to hook up the headphones’ microphone. Toggling Bluetooth off and back on forces a clean reconnection and will reset that routing.
- On iPhone: Go to Settings > Bluetooth, toggle off, wait 10-15 seconds, then turn it back on. AirPods should reconnect automatically in a few seconds.
- On a Mac: Open Apple menu > System Settings > Bluetooth and do the same.
If you toggle Bluetooth from Control Center, it will only disable it temporarily (it re-enables after about an hour). For a proper reset, go through Settings instead.
5. Test One AirPod at a Time
AirPods dynamically switch the active mic between the left and right earbud to select the clearest sound. When that swap glitches or one side’s mesh is clogged or damp, the microphone can seem unresponsive even though the one AirPod is in a good state.
Lock the microphone to a single side, and you’ll see what is going on:
- With both AirPods in the ears, open Settings on iPhone/iPad and tap your AirPods name at the top.
- Tap Microphone.
- Choose Always Left AirPod, then open Voice Memos and record a quick clip.
- Switch to Always Right AirPod and record another test.
- Compare both playbacks.

If one side sounds fine and the other is silent or muffled, you have pinpointed which AirPod has the issue. Give the faulty one a good clean, which often has a blocked mic opening.
After that, go back to Settings > Microphone and set it back to Automatically Switch AirPods.
6. Toggle Automatic Ear Detection
Automatic Ear Detection pauses audio when you remove an AirPod from your ear and resumes it once reinserted. Occasionally, particularly after you have taken them in and out a few times in a row, the mic won’t completely wake up.
Here’s a quick fix:
- Open Settings and tap your AirPods name.
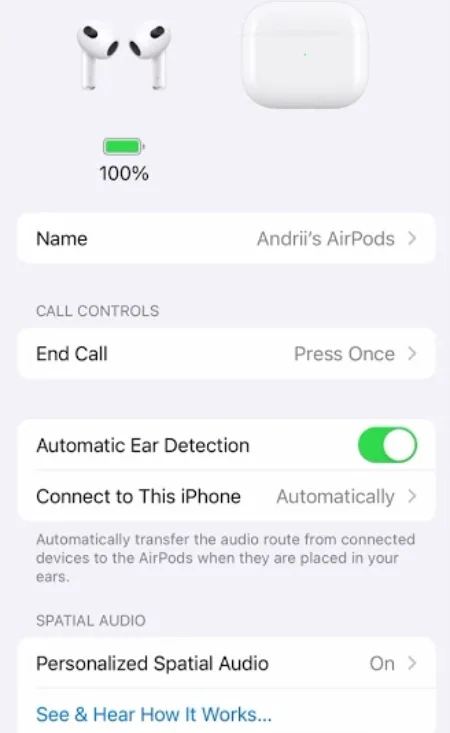
- Turn off Automatic Ear Detection.
- Wait about 15 seconds.
- Toggle it back on.
Related: Can You Connect AirPods to PS4?
7. Clean AirPods Microphone Mesh
If the mic works but your voice sounds muffled, distant, or barely audible, a blocked mesh is almost certainly to blame. The microphone is equipped at the bottom of the stem on all AirPods, while the Pro models have a secondary mic vent near the top.
Every day, earwax, lint, and skin oils build up in the little holes. A partially blocked mesh makes you sound like you’re in another room, and a fully blocked one produces near-silence on calls.
How to clean safely:
- Place the AirPods on a clean, dry, well‑lit surface so you can see the openings.
- Wipe the outside with a soft, dry, lint-free cloth.
- Use a soft, dry brush (a clean toothbrush is better) to gently loosen debris from the mesh, brushing across the opening rather than pressing into it.
- Follow up with a dry cotton swab to lift away what the brush dislodged.
- Inspect the opening under good light before calling it done.
Don’t stick anything sharp into the mic holes. Stay away from water, rubbing alcohol, or any liquid right on the mic openings—moisture inside the housing can ruin them for good. If the buildup is thick and stubborn, bring your AirPods to an Apple Store or an Apple Authorized Service Provider for a professional clean.
8. Turn Off AirDrop
AirDrop regularly scans Bluetooth and Wi‑Fi in the background to detect nearby Apple devices. When the air is crowded with wireless traffic, the scanning can destabilize the Bluetooth link with your AirPods, including the microphone channel.
Swipe down to open Control Center, tap AirDrop, and select Receiving Off. Check again, and if the mic behaves better, set AirDrop to Contacts Only instead of Everyone to reduce the scanning load.

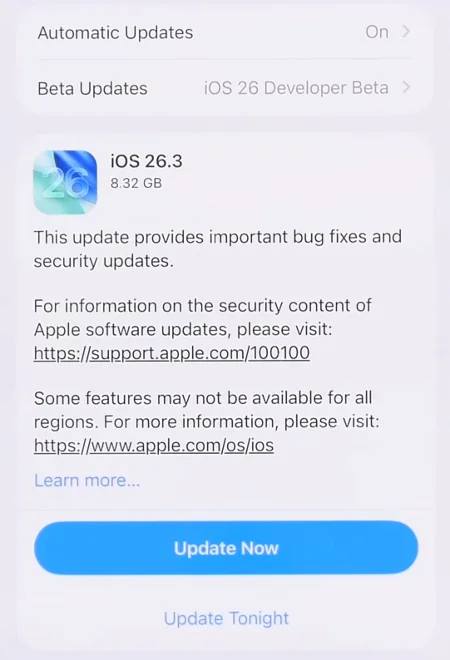
9. Update Your Phone & AirPods
Confirm that both your iPhone and AirPods have the latest software versions installed. To check for iOS updates on iPhone, open Settings > General > Software Update. To update your AirPods, place them in their case, connect the case to a power source, and keep it near your paired device.
10. Forget AirPods and Re-Pair
Over time, Bluetooth pairing data can become corrupted, especially after iOS updates or when AirPods are frequently connected and disconnected across multiple devices. Forgetting the earphones and pairing again provides a clean slate.
- Put both AirPods in the case and close the lid.
- Go to Settings > Bluetooth
- Tap the i icon next to your AirPods name.
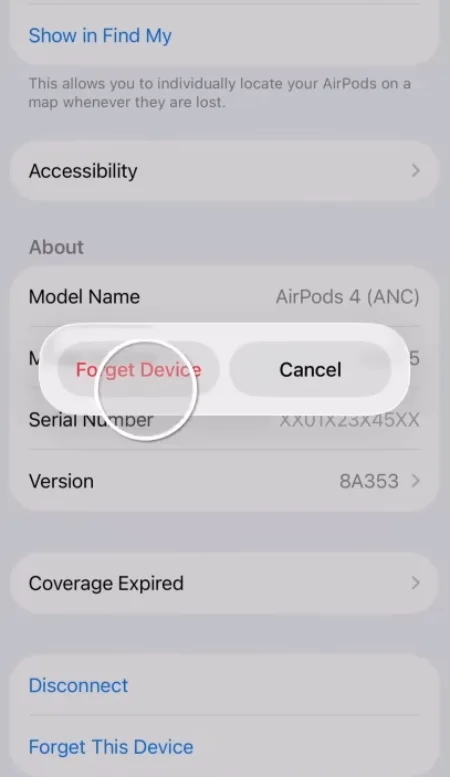
- Tap Forget This Device and confirm.
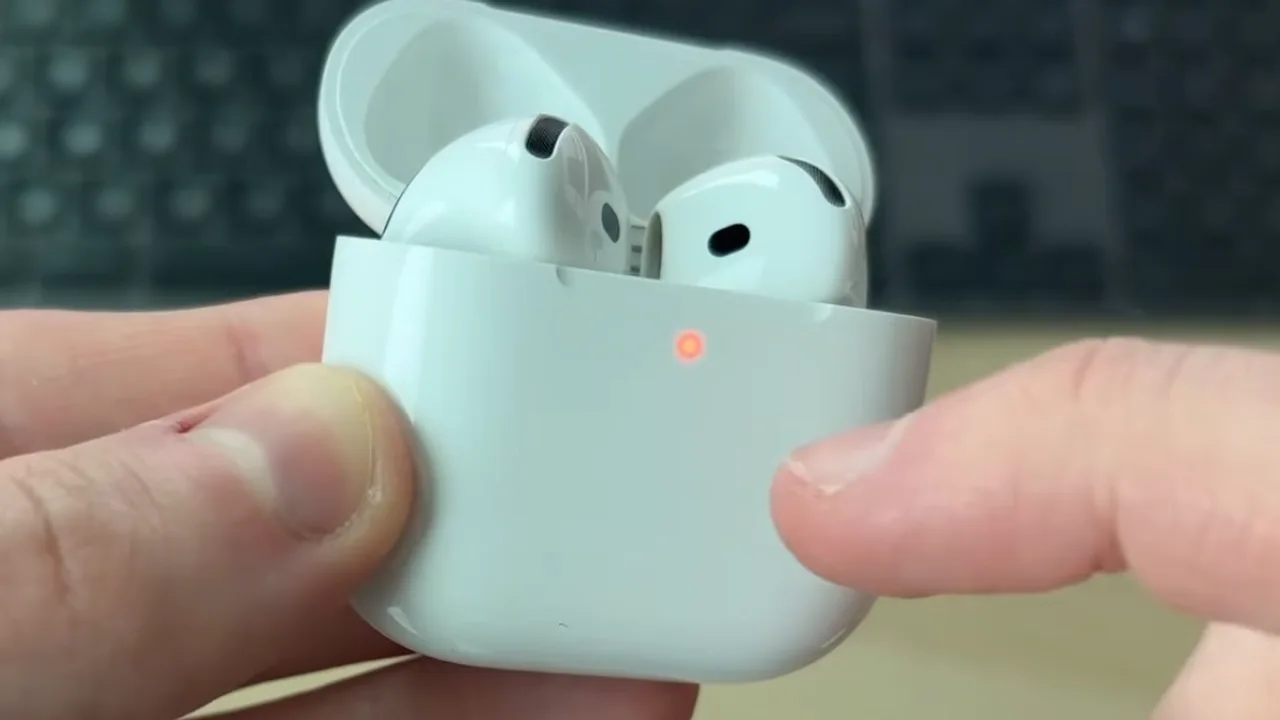
- Open the case lid and press the small setup button on the back.
- Hold it until the status light flashes amber, then turns white.
- Bring the open case near your iPhone and follow the on‑screen prompts.
Once AirPods are forgotten, they will be removed from all devices signed into your Apple ID. When you re-pair them, iCloud will automatically resync them to all your devices.
11. Reset Network Settings on iPhone
If a simple re‑pair didn’t fix it, digging deeper with a network reset can help, which will erase all Bluetooth pairings, Wi‑Fi passwords, and cellular network configurations, and clear out any corrupted Bluetooth data. But make sure to have your Internet passwords written down or somewhere safe before you proceed.
- Tap Settings > General > Transfer or Reset iPhone > Reset > Reset Network Settings.
- Enter your passcode, and let the phone restart.
- Pair the AirPods again using the setup button on the case and run a mic test.
12. Factory Reset AirPods
A factory reset strips the AirPods of all their own settings, basically the most thorough software fix short of getting a new pair from Apple. After this, your trusty earbuds will act just like they’re fresh out of the box.
- Put both AirPods in the case and leave the lid open.
- Press and hold the setup button on the back of the case for about 15 seconds.
- Watch the light flash amber a few times, then turn solid white.
- Bring the open case near your iPhone and follow the instructions on the screen to repair.
Contact Apple Support
If every fix above has failed, try one last test before you call Apple: borrow a friend’s iPhone or pick another Apple device and connect your AirPods to it. Open Settings, tap your AirPods, and lock the mic to each side just like you did in the earlier troubleshooting step. Then record a note in Voice Memos for each setting.
If the microphone works on the second device but not on yours, the issue lies in your phone. Your next move is to reset your iPhone via Finder or iTunes, or get help from Apple Support for a software glitch.
If the AirPods mic still won’t work on the second device after you’ve tried everything, the earbuds have a fault. Visit support.apple.com/airpods or schedule a Genius Bar visit at the nearest Apple Store. AirPods covered by the one‑year limited warranty can be replaced at no charge for manufacturing defects. AppleCare+ will cover accidental damage up to two times a year for a service fee. Out-of-warranty replacements are sold per individual earbud that’s broken, so you only replace the side that’s actually damaged.


