

- Is It a Hardware or Software Problem?
- Hardware Checks: Go Through the Basics First
- Fix 1: Try a Different Cable
- Fix 2: Try a Different Charger or Power Adapter
- Fix 3: Try a Different Power Source
- Fix 4: Clean the Charging Port
- Fix 5: Inspect the Port for Physical Damage
- Fix 6: Dry the Phone Properly After Water Exposure
- Software Fixes for Android Phone Not Charging
- Fix 7: Force Restart Your Phone
- Fix 8: Disable Battery Saver and Adaptive Charging
- Fix 9: Reset the USB Charging Mode
- Fix 10: Boot into Safe Mode
- Fix 11: Install Pending System Updates
- When the Battery Itself is the Problem
- Fix 12: Investigate Battery Age and Degradation
- Why is My Phone Not Charging Even Though It Says it is?
- Insufficient Input Voltage
- Battery Calibration Drift
- High Background Draw
- When to Get Professional Help
- Repair Cost Reference
- How We Tested
- Frequently Asked Questions
- Can my phone stop charging because it’s overheating?
- Is wireless charging safe if the wired port is damaged?
- Does fast charging damage the battery in the long term?
If your Android phone won’t charge or the icon appears but the battery percentage stays flat, don’t assume it’s a broken port or a dead battery. In most cases, the problem is either the cable, the power adapter, compacted lint in the port, or a stalled software process, all of which are fixable without a trip to the repair shop.
Follow this guide from the most likely cause to the most severe to troubleshoot the phone not charging problem. You’ll save yourself the cost of unnecessary repairs.
First, forget the myth that your USB-C port is damaged. That’s rarely the case. Almost 70% of Android charging failures can be fixed by simply using a different cable or cleaning compacted lint from the port. Work through the basics before assuming the worst.
Related: How to Fix Internet Connection Issues on Android Devices
Is It a Hardware or Software Problem?
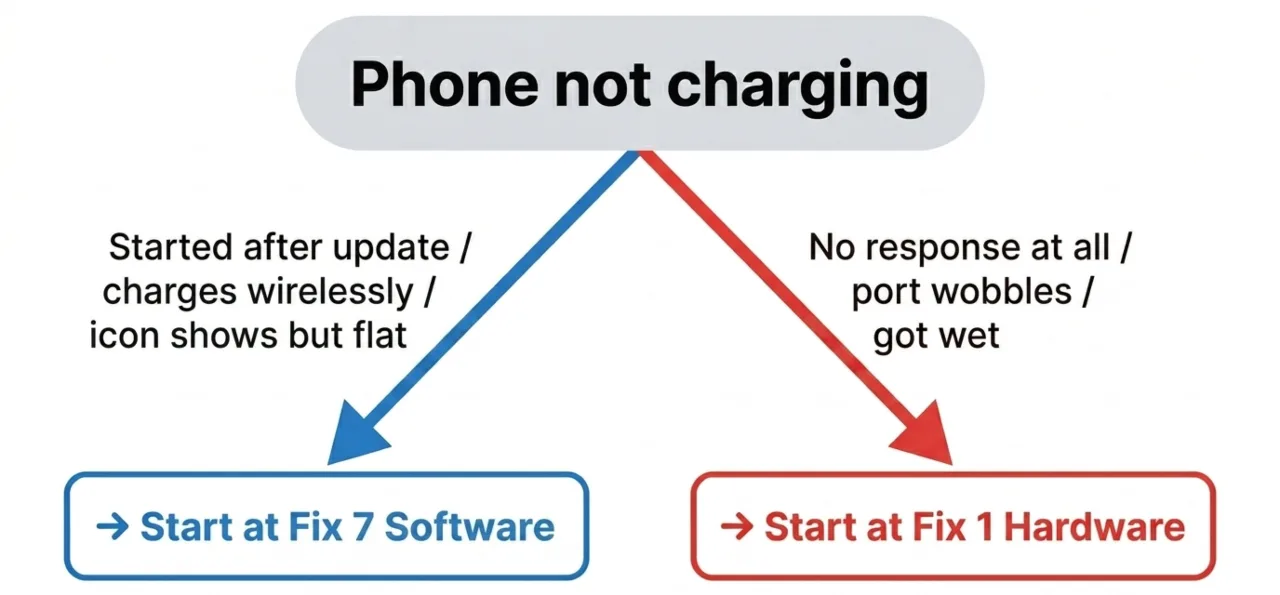
Take a moment to observe the phone’s charging behavior as it plugs into the adapter. In two minutes, you’ll see whether the problem is physical or a software glitch, and that will direct you to the right section of this guide.
Plug in the charger you normally use and answer the following:
- Does the phone show any response like a screen flash, charging icon, or vibration?
- Does the charging icon appear, but the battery percentage doesn’t increase or drop?
- Does it charge on a wireless pad but not via cable?
- Did the issue begin instantly after a software update
- Did the phone get wet, overheat, or recently take a fall?
| Symptom | Most likely cause | Start here |
|---|---|---|
| No response at all when plugged in | Hardware (or charging daemon crash) | Fix 1 |
| Charges wirelessly, not via cable | Hardware — port or cable | Fix 1, then Fix 4 |
| Charging icon shows, but the percentage stays flat | Both software & hardware possible — low-watt or background app | Fix 2, then Fix 10 |
| Problem started right after a system update | Software | Fix 7, then Fix 11 |
| Very slow charge regardless of the charger used | Software (settings or app) or aging battery | Fix 8, then Fix 12 |
| Phone got wet before the issue happened | Hardware — moisture or corrosion | Fix 6 |
| Charges only when the cable is held at one angle | Hardware — cracked port solder joint | Professional service |
From the table, if you figure out that your phone charging issue is related to software, start troubleshooting with Fix 7. Otherwise, work from Fix 1 as hardware causes are more common and fast to rule out.
Hardware Checks: Go Through the Basics First
Physical connections fail more often than microchips. These six methods take under 10 minutes combined and fix the majority of charging problems.
Fix 1: Try a Different Cable
The USB-C cable is the single most common point of failure in any charging setup, and the most deceptive.
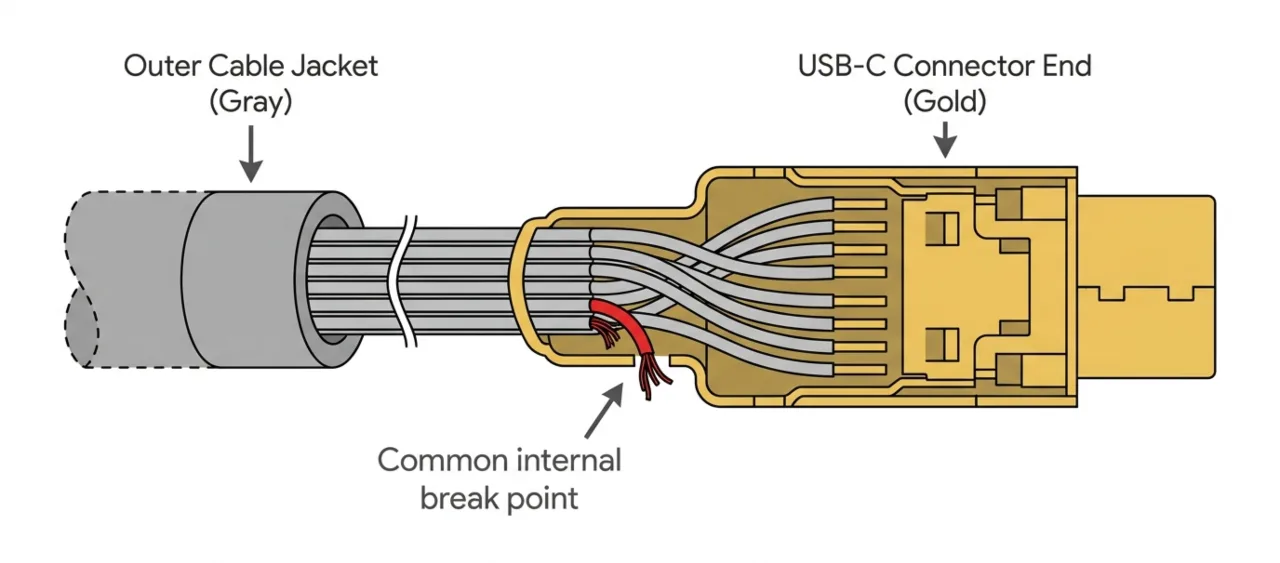
Unlike the old Micro-USB design, USB-C cables have no external locking tab. Instead, a thin plastic tongue and the metal shell’s friction hold the cable in place inside the connector. Every insertion and removal cycle stresses the internal copper strands.
Over months, these strands fatigue and break right where the cable meets the hard housing, the exact spot where there’s no bend relief to share the stress. The outer insulation stays intact, and the wire looks fine. But internally, it’s broken.
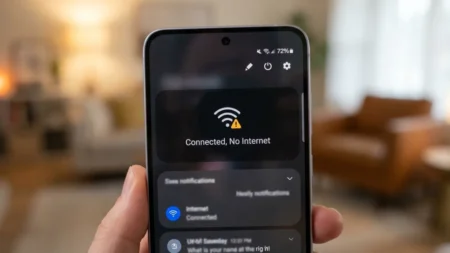
Beyond the power wires, USB‑C cables have a pair of CC (Configuration Channel) pins. These are the lines the phone and charger use to negotiate how much power to exchange, a USB Power Delivery handshake. If the CC lines get damaged, the communication breaks. Your phone will detect pin contact, flash the charging icon for a moment, but nothing actually charges. This is why a dead cable and a broken port produce nearly similar symptoms.
- Find a second cable from a friend, colleague, or another device in your home.
- Connect it to the same charger and wall outlet you were using.
- Plug into your phone and watch the charging indicator for 20-30 seconds.
- If the phone charges normally, the original cable is dead. Replace it.
USB‑PD 3.0 cables over 60 W must have an e‑marker chip. When you plug it in, the charger reads the chip to verify voltage and current limits. Without a valid e-marker, a 100W charger will cap power delivery at 5V/3A as a safety precaution, or refuse to charge at all.
Counterfeit or cheap, unbranded cables skip the e-marker. They fake the detection pins enough to light the charging icon, but the charger never receives confirmation that the cable can handle high power. As a result, the icon shows, but the battery barely moves. Always buy cables that explicitly state USB‑IF certification or include a printed e-marker specification on the package.
Fix 2: Try a Different Charger or Power Adapter
People swap cables but rarely change the wall adapter, an upside‑down habit, since adapters fail far more often than cables.
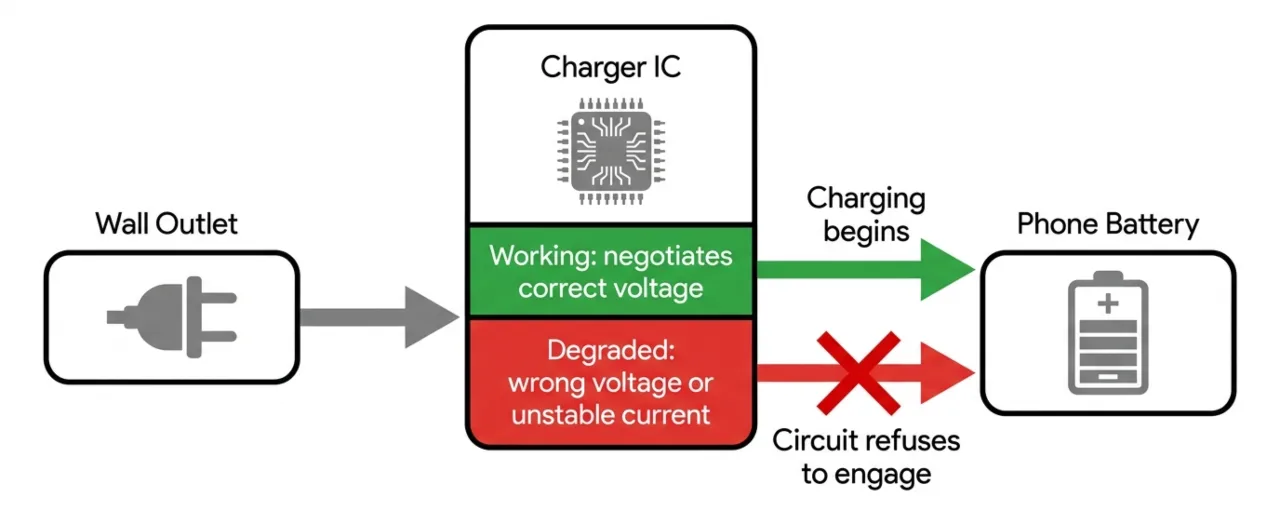
Every modern fast‑charging adapter contains a controller IC (integrated circuit) that runs the USB Power Delivery protocol. Standard USB PD 3.0 delivers fixed voltages like 5V, 9V, 15V, or 20V. The device requests a specific amount, the charger confirms, and current flows.
Programmable Power Supply (PPS), used in Samsung Galaxy phones for fast charging, takes things a step further. It adjusts voltage in 20 mV increments and current in 50 mA steps in real time, based on the battery’s exact state. This is how its 45W charging avoids excessive heat, even at high wattage.
When the IC degrades from repeated heat cycles or a power surge, it loses the ability to negotiate correctly. The device sees a connection but receives either the wrong voltage or unstable current, so the charging circuit refuses to engage. Charging either fails or crawls.
- Use a known-working charger from a laptop, tablet, or another phone.
- Pair it with the cable that passed the test in Fix 1.
- Plug into a different wall outlet to eliminate a dead socket as a variable.
- Wait 60 seconds and check if the charging percentage begins to climb.
Check the charger label or box. A PPS-capable adapter lists outputs like 3.3–5.9V / 3A, 3.3–11V / 2.25A – the range with a slash is the PPS profile. A PD-only adapter shows fixed steps: 5V / 3A, 9V / 2.22A, 15V / 1.67A. Both will charge your phone safely. PPS is needed only for Samsung’s top-speed Super Fast Charging, while a regular USB-PD 3.0 brick will charge a Pixel or Galaxy at a reduced but still fast rate.
Fix 3: Try a Different Power Source
A standard USB-A port on a laptop or desktop PC outputs 0.5W to 0.9W by default under the USB 2.0 specification. It’s far below the 18W-65W range that flagship Android phones expect. Plugging your mobile into a USB-A port will provide only negligible power. You might even watch your Android battery drain while the handset falsely claims it’s receiving juice when idle draw outpaces the port’s delivery.
- Move to a wall outlet. A wall socket with a proper adapter is the most reliable source.
- Avoid USB hubs and extension cables. They add resistance and drop the voltage.
- Be cautious with car chargers. A car adapter labelled 18W or 20W may deliver far less under real conditions, because the 12V car circuit fluctuates with engine load and the adapter’s components are often underspecified for the label. If your mobile charges poorly in the vehicle but fine from a wall outlet, the car socket is likely the issue.
Related: How to Do a Factory Reset on Android
Fix 4: Clean the Charging Port
Lint compaction is the most underdiagnosed charging fault on Android devices. Phones carried in jeans or trouser pockets accumulate lint inside the USB-C port over weeks and months until the cable no longer seats properly against the charging pins. It might still show a connection because the pins make partial contact, but charge unreliably or not at all.
Shine a flashlight directly into the port. A clean port shows a flat, unobstructed base with straight gold-coloured pins. If the bottom of the port looks grey, dark, or filled, that’s lint, and this is almost certainly your problem.
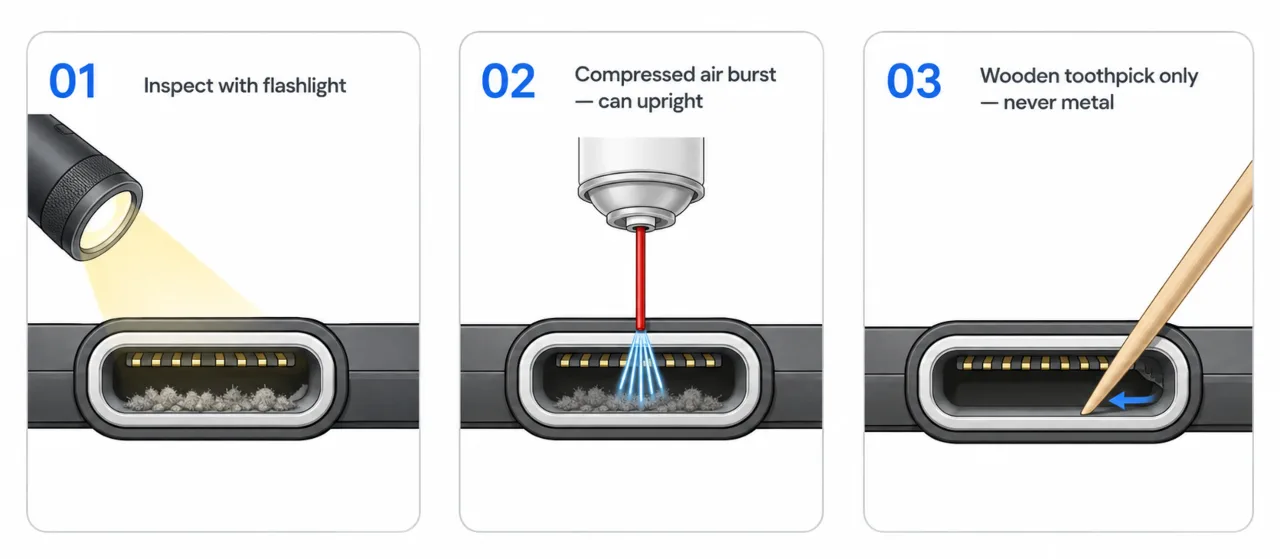
Safe cleaning procedure:
- Power off the phone.
- Hold a can of compressed air upright and deliver three or four 1–2 second bursts from slightly different angles to dislodge loose debris.
- For compacted lint, use only a wooden or plastic toothpick, never metal. Gently scrape along the inside walls and base, working debris outward. Do not press directly against the pins.
- Then, give it another puff of compressed air to blow away the loosened dirt.
- Reinsert the cable. You should hear a solid click when it seats properly. If it feels squishy or loose, there’s still some debris left inside.
- Power on and see if it’s charging.
Metal SIM ejector pins, sewing needles, compressed air held upside down (dispenses freezing liquid that damages pins), cotton swabs (fibres catch and worsen the blockage), or isopropyl alcohol sprayed directly into the port. Apply 90%+ isopropyl alcohol only to the tip of a wooden toothpick to clean corrosion.
Fix 5: Inspect the Port for Physical Damage
If the port is clean but still won’t connect, check the USB-C receptacle for structural damage. Use a flashlight to inspect the inside and look for these issues:
- Bent or displaced pins: The plastic tongue that holds the pin array must lie flat and level in the port cavity. Any upward tilt, downward angle, or visible twist prevents the cable from proper seating. That calls for a professional port replacement—trying to bend the tongue with a tool will likely snap it, and convert a repairable fault into a board-level repair.
- Corrosion (orange, green, or white discoloration): Follows water or humidity exposure. The orange-brown color is iron oxide from traces of steel in the housing, and the green is copper carbonate or copper hydroxide that forms on the pins’ exposed copper base after their gold plating gets damaged.
- Light corrosion, a faint discoloration on one or two pins, can be treated carefully with 90%+ IPA on a wooden toothpick.
- Heavy corrosion, where the discoloration is thick, widespread, or forms a visible crust, has usually bridged across multiple pins, creating low-resistance short-circuit paths. This situation needs professional ultrasonic cleaning in isopropyl alcohol to safely remove without creating further shorts.
- Loose port: Insert a cable and wiggle it gently side to side without force. More than a millimetre of side-to-side play means the solder joints in the port have likely cracked away from the PCB. Fixing that is a board‑level job that involves magnification, a hot‑air rework setup, and experience. Do not attempt it at home.
- Liquid damage: Check the SIM tray slot. A small paper indicator turns red on most Android phones when exposed to water.
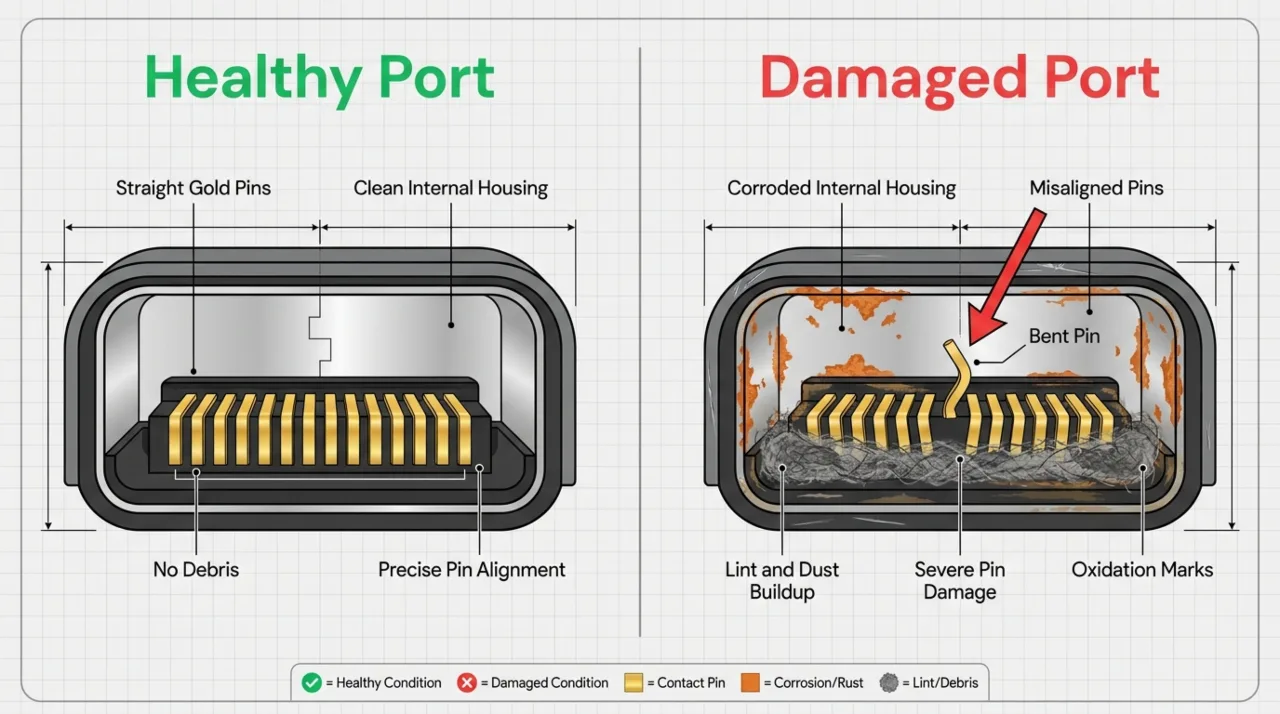
In case of visible pin damage or a loose port, the device needs professional service. Arrange these repairs immediately. Meanwhile, try the software fixes in parallel, as a code issue can exacerbate a partial hardware fault.
Fix 6: Dry the Phone Properly After Water Exposure
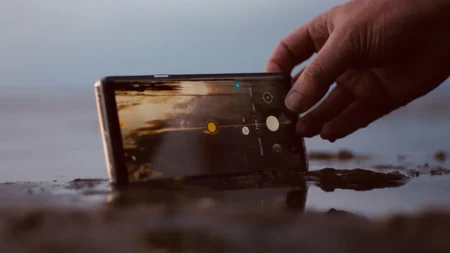
If the phone was submerged, splashed, or exposed to rain before the charging problem started, treat moisture as the primary suspect. Leave all other methods and deal with it first.
When current moves through a wet port, even a thin water film becomes an electrolyte (a solution that conducts electricity by allowing charged ions to move through it). With DC applied, the electrolysis process starts in which metal atoms at the positive terminal (anode) dissolve into the electrolyte.
On a USB‑C port, the first to go is the gold plating on the pins, which is only 0.05 to 0.1 micrometres thick. Once the gold disappears, the underlying nickel and copper are exposed. Copper ions travel through the electrolyte film and deposit as dendritic growths on adjacent pins, eventually bridging them and creating a permanent short. This entire process can finish in minutes under powered conditions, and the failure in result is impossible to fix by cleaning.
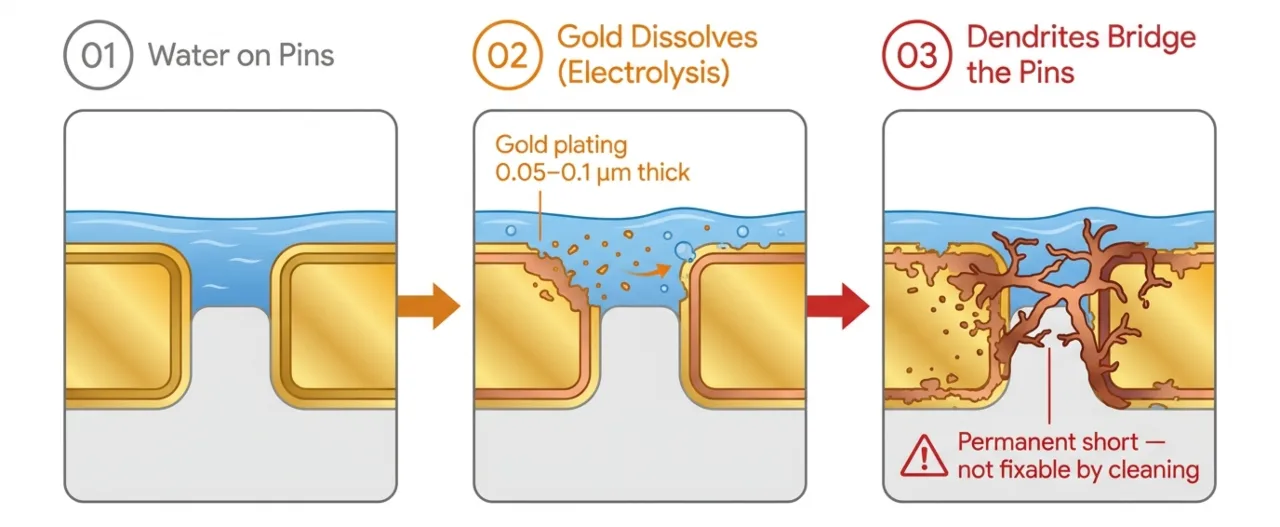
Do not attempt to charge a phone you suspect is wet, and avoid testing if it still powers on. Both actions push current through the damp circuitry and can ruin it permanently for good. Power the device off immediately if it is still on, and leave it off until fully dry.
- Power off the device. If already off, leave it off.
- Remove the SIM tray to open another exit path for moisture to escape.
- Gently shake the phone with the port facing down to expel visible water from the port opening.
- Place it in front of a fan. Some airflow around the device creates a slight pressure differential that draws out the moisture. Moving air promotes evaporation far more effectively than any static absorbent. Avoid direct sunlight, an oven, a hair dryer, or a bowl of rice, as they can’t force moisture out of the sealed parts, and heat speeds up corrosion.
- Wait before attempting to charge: at least 24 hours after a brief splash, and 48 hours after major submersion.
Once dried, inspect the port under a light for corrosion and clean as necessary.
Related: How to Share Location on Android
IP67 and IP68 reflect water‑resistance measured in a controlled lab environment with fresh water at set depths and times. As seals age, the protection wanes, and the tests don’t include saltwater, chlorinated pools, or high‑pressure jets. The seals also degrade with time, temperature cycles, and drops. An IP68 phone that is two years old and has fallen twice has less water resistance than the day it was manufactured. The rating is a minimum performance threshold at the time of production, not a lifetime guarantee.
Software Fixes for Android Phone Not Charging
If you’ve checked the cables, chargers, and ports and they are all functional, then it’s probably software conflicting with the charging cycle.
Fix 7: Force Restart Your Phone
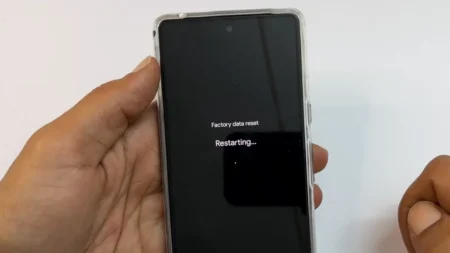
The charging system works in the background. After a few days of nonstop uptime without reboot, or if the battery drains to zero before you plug it in, the charging daemon can get stuck. Just give the phone a hard restart, and it’ll clear the system, with no data loss.
After the restart, plug in the charger and wait 60 seconds to see the current status. The charging process takes a moment to initialize on a cold boot.
Fix 8: Disable Battery Saver and Adaptive Charging
Two software features can deliberately halt or slow charging in ways that might fool you into thinking the fault is hardware.
Battery Saver throttles background activity and, on some manufacturer builds, deliberately slows charging speed to reduce heat.
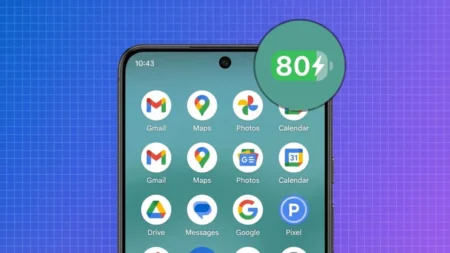
Nowadays, Android versions use machine learning to extend long-term battery lifespans. Adaptive Charging (called Battery Protection on some Samsung builds) stops charging at 80% overnight and delays the final 20% until shortly before your morning alarm.
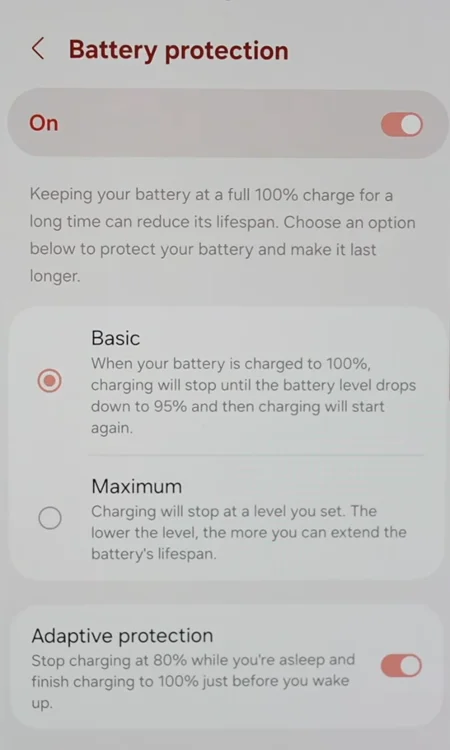
- On Samsung: Go to Settings > Battery > Power Saving and turn it off. Then go to Settings > Battery > Battery Protection (or More battery settings) and also disable it.
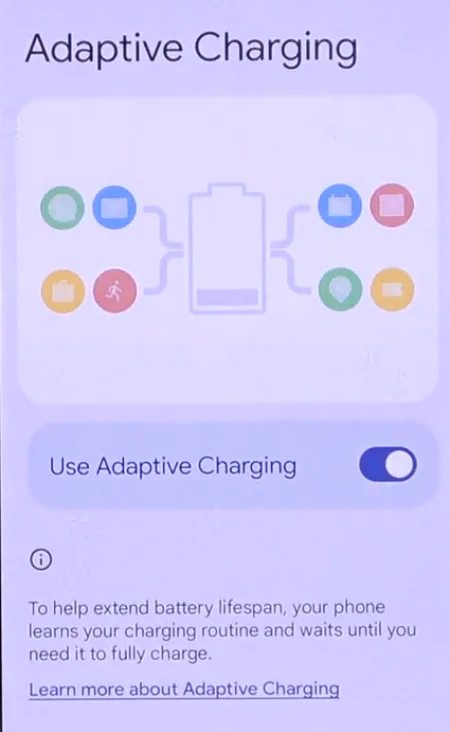
- On Pixel: Tap Settings > Battery > Battery Saver and disable it. Then open Settings > Battery > Adaptive Charging and toggle it off. Also check “Set a Schedule,” which may automatically re-enable Battery Saver below a set threshold.
Fix 9: Reset the USB Charging Mode
When Android detects a USB-C cable, it queries a connection mode: Charging Only, File Transfer (MTP), MIDI, or USB Tethering. On some smartphones, especially older Samsung models, the system falls back to File Transfer instead of Charging Only. That setting sends power differently, so even a good adapter can end up charging slowly or not at all.
- Plug in the cable as normal.
- Pull down the notification shade from the top of the screen.
- Find the notification that reads “Charging this device via USB” or “USB connected.”
- Tap it to open USB preferences.
- Select Charging / No data transfer and confirm.
If this notification does not appear, tap Settings > Connected Devices > USB Preferences (exact path varies by manufacturer).
If USB preferences are correct but charging still misbehaves, its configuration cache might be corrupted. To clear it:
- Open Settings > Apps.
- Tap the filter icon and enable Show system apps.
- Scroll down or search to find USB Settings (or Android System on some software skins).
- Tap Storage > Clear Cache, then Clear Data (or Clear User Data).
- Restart the phone and reconnect the charger.
Fix 10: Boot into Safe Mode
Third-party battery managers, RAM cleaners, task killers, and certain antivirus apps can terminate the background services Android needs to manage current input. Safe Mode temporarily disables all third-party apps without deleting any of them. If the phone charges normally in Safe Mode, a downloaded app is responsible.
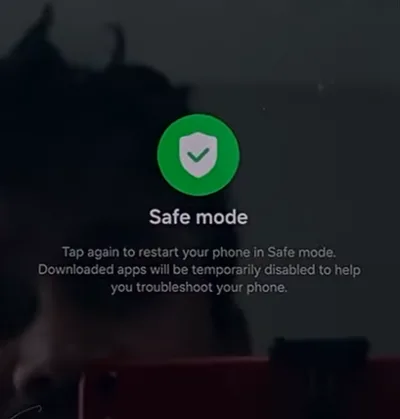
- Samsung: Press and hold the Power button > tap and hold Power Off on screen until a Safe Mode prompt appears > tap Safe Mode.
- Pixel: Press and hold the Power button > tap and hold Power off until the Safe Mode prompt appears > tap OK.
The smartphone will reboot with “Safe Mode” watermark in the bottom corner. Plug in the charger and wait 5 minutes. If charging works, restart normally and uninstall recently added battery or utility apps one at a time until normal charging resumes. To exit the mode, restart your phone.
Fix 11: Install Pending System Updates
Charging bugs introduced by software updates are very common. Manufacturers regularly deploy hotfixes to address glitches in charging controllers, battery reporting, and thermal throttling tables. If you faced an issue after an update, a follow-up patch may already be available.
To check for and install pending system updates:
- Connect to a stable Wi-Fi network.
- On Samsung, tap Settings > Software Update > Download and Install.
- On Pixel, open Settings > System > Software updates (or System update).
- If an update is available, install it and reboot the phone.
If charging failed immediately post update and there’s no new patch yet, boot into Android’s recovery mode and wipe the system cache partition. It will remove the old compiled cache, which can clash with the new libraries. Search your phone model plus “clear cache partition recovery mode” to find the right button combo.
When the Battery Itself is the Problem
Fix 12: Investigate Battery Age and Degradation
Lithium-ion cells degrade through a process called capacity fade. Each charge cycle causes microscopic structural changes in the electrode materials as the graphite anode expands and contracts when lithium ions intercalate during charging and leave during discharge.
Over hundreds of cycles, this mechanical stress causes the electrode material to crack and lose contact with the current collector. Separately, a thin film called the Solid Electrolyte Interphase (SEI) grows on the anode surface with each cycle that consumes active lithium and permanently reduces the amount available to store charge. The result is a battery that holds less energy than it did when new.
Lithium-ion cells are rated for 500 to 800 full charge cycles before their capacity drops to 80% of their original. When that happens, a phone that used to survive all day on a single charge can die at 20 % reported charge, because the cell’s usable range has shrunk, and the software’s percentage estimate often misses the mark.
A battery below 70% health can lead to irregularities, including intermittent charging, excessive heat, or an inability to hold a charge above a certain level. These are symptoms of cell degradation. To analyze the cell wear, learn how to check battery health on an Android device.
When battery replacement is worth it:
- The phone is under 3 years old and otherwise works well.
- Battery health confirms below 80% after the diagnostic.
- The device turns off at 20–30% remaining charge.
- Replacement normally costs $30–$80 at an authorized service center, and extends device life by 2+ years.
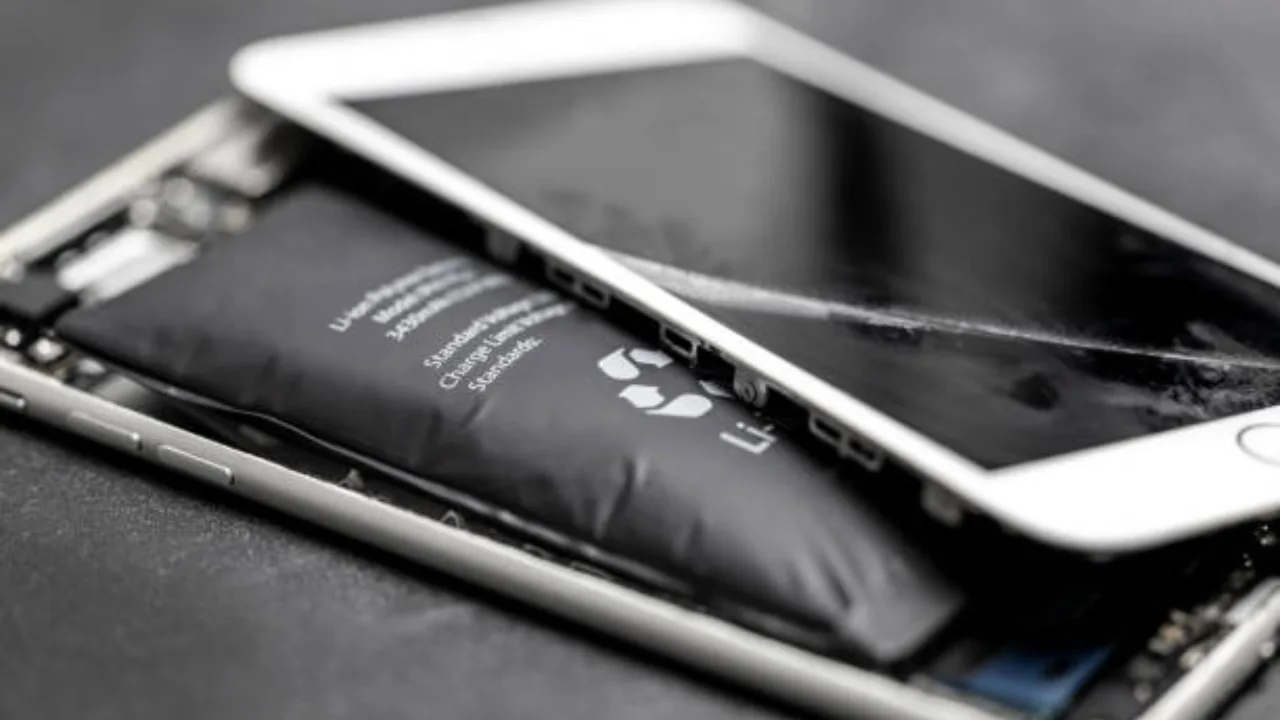
If the back cover lifts or bulges, the screen has a slight raised gap on one side, or the phone feels warmer than usual during standby, stop charging right away. A swollen lithium‑ion battery can catch fire. Don’t charge it, pierce it, or place it in a sealed container. Take the phone to an authorized service center or electronics recycler as soon as possible.
Related: How to Fix a Slow Android Phone: 16 Ways to Speed Up Device
Why is My Phone Not Charging Even Though It Says it is?
What’s happening is that the software thinks the USB pins have closed the circuit, so it displays the charging prompt. In reality, no energy is actually making its way into the battery, or it’s even flowing out.
Insufficient Input Voltage
Your phone detects the charger’s voltage and flashes the icon, but the current never quite reaches the level the device needs while it’s idle. When you’re using it with the screen lit, everything running, and it’s connected to a 5 W charger, the battery will still drain even though the charging symbol stays on.
How to Fix: Use the manufacturer’s original charger or one that matches the mobile’s supported charging protocol.
Battery Calibration Drift
After a couple of years, the battery‑management IC stops tracking the cell’s real capacity. The % display becomes inaccurate – it might show 45% when the battery is at 30 %, or it could keep saying it’s charging even though the reading is stuck. You’ll run into this most often after two or three years of use.
How to Fix: Drain the battery until the phone powers off, wait about half an hour, then plug it in and let it charge to 100 % while it stays off. After the charging completes, turn the device back on. That simple cycle often resets the reporting IC. When calibration drift is the root cause, this trick works roughly 60 % of the time.
High Background Draw
When a background app gets caught in a loop, using maximum CPU cores alongside active GPS or high brightness, the phone can draw 8W of power while the charger supplies only 5W.
How to Fix: Enable Airplane Mode while charging to eliminate all radios and background sync. If the percentage climbs normally, a background process is the culprit. Use Fix 10 (Safe Mode) to identify which app is responsible.
When to Get Professional Help
Take your phone to experts in the service center when:
- It won’t respond to any charger, cable, or power source after all the above solutions are tried.
- The charging port has visible bent pins, loose movement, or heavy corrosion that cleaning fails to remove.
- The battery is visibly swollen, or the casing is separating from the body.
- The phone charges wirelessly but not with any cable, confirming a faulty port.
- Charging works only in one cable position, a common symptom of a cracked port solder joint.
Repair Cost Reference
| Repair Type | Authorized Service | Third-Party Repair | Warranty Impact |
|---|---|---|---|
| USB-C port replacement | $60–$120 | $25–$70 | May affect the remaining device warranty |
| Battery replacement | $50–$100 | $30–$70 | Varies by brand policy |
| Charging IC board repair | $120–$250+ | $80–$180 | Voids warranty |
| Water damage (ultrasonic clean) | $100–$200 | $60–$150 | Water damage voids the warranty regardless |
Before you green‑light repair, double‑check the warranty: Samsung warranty check or Google Pixel warranty. In the US, the Magnuson-Moss Warranty Act stops a manufacturer from voiding your whole device warranty just because a third party replaced a battery, though they might deny coverage for that particular part.
How We Tested
We tried every fix on physical hardware before publication. Testing was conducted on a Samsung Galaxy S24 with One UI 6.1 and a Google Pixel 9 on Android 15. First, we used manufacturer-supplied cables and adapters as a baseline, then retested with third-party gear of varying quality grades, including intentionally degraded cables with cut data lines, low-wattage generic adapters, and USB hubs, to see the exact failures each step describes.
Port cleaning procedures were done on two additional devices, with documented lint compaction confirmed under a jeweller’s loupe before and after the clean‑up. The safety warnings for compressed air and IPA concentration were verified against the material safety data sheets (MSDS) for the commercial cans we’d use, and we made sure the IPA‑to‑water mix would not dissolve metal oxides.
We double‑checked the software‑fix menu paths on production firmware. Samsung’s routes line up with One UI 6.1, and we ran them through the One UI 7 docs to be sure, while pixel settings were confirmed on Android 15.
Frequently Asked Questions
Can my phone stop charging because it’s overheating?
Yes. Android’s thermal protection protocol stops incoming power when the battery temperature exceeds safe operating limits, typically around 45 °C (113 °F). Disconnect the charger, remove the case, move the phone to a cool room away from direct sunlight, and let it rest for 20 minutes before reconnecting.
Is wireless charging safe if the wired port is damaged?
Yes, wireless charging uses separate inductive copper coils mounted under the phone’s back glass panel that bypass the physical USB-C port. If your port is damaged due to liquid exposure or bent pins, charging wirelessly on a Qi or Qi2 pad is completely safe and an effective long-term workaround.
Does fast charging damage the battery in the long term?
Fast charging generates more heat than standard charging, and heat is the primary driver of lithium-ion battery degradation. However, modern OEM implementations manage this with thermal throttling and stepped charging curves that reduce the power as the battery fills. The manufacturer’s own fast charger is safe for daily use.
Did this fix your issue?
Let us know. Your feedback helps other readers find the right solution.
Great! What solved it for you?
We read every response. Email is optional and never shared.
Sorry to hear that. What happened when you tried?
Leave your email and we will personally help you fix it.