- What Happens When You Disable Driver Signature Enforcement?
- Method 1: Disable Driver Signature Enforcement from Startup Settings
- Method 2: Turn Off Driver Signature Enforcement via Command Prompt
- Method 3: Disable DSE on Windows 11 from Advanced Boot Options
- Method 4: Disable Driver Signature Enforcement using Group Policy Editor
- How to Enable Group Policy Editor on Windows 11 Home
- How to Re-Enable Driver Signature Enforcement
Driver Signature Enforcement (DSE) is a security feature in Windows 11 that blocks the installation of drivers that lack an official Microsoft digital signature. Most of the time, that’s a good thing as it keeps malicious/unstable drivers and kernel-level malware off your PC. But there can be legitimate situations where you need to bypass DSE to install drivers for legacy hardware, test custom drivers during development, or run specific applications or games that require unsigned components.
Windows 11 lets you turn off Driver Signature Enforcement in different ways. You can do it temporarily for a single restart or use the command prompt for a permanent fix. Here’s how to disable DSE temporarily or permanently on Windows 11 and what you should know before you begin.
Read: How to Fix Blue Screen of Death (BSOD) on Windows
What Happens When You Disable Driver Signature Enforcement?
When you disable DSE, Windows won’t check signatures for new drivers anymore. I highly recommend understanding the trade-off here and what you’re going to do before you proceed.
- The upside: You get absolute control over your machine. Now, you are free to install drivers for the 15-year-old printer, run custom software developed by the community, or get specific game launchers and bypasses working that rely on unsigned hypervisor drivers. Developers often do this for their work.
- The downside: With Driver Signature Enforcement off, Windows will load any driver, regardless of its origin. You’ll be exposed to poorly coded programs that could crash your system or, worse, malware disguised as legitimate drivers, a full security compromise at the root level. Once installed, these unsigned drivers have deep system access. Only disable this feature when you really need to, and make sure any drivers you install are from a source you completely trust.
Method 1: Disable Driver Signature Enforcement from Startup Settings
Windows 11 advanced startup settings let you make changes unavailable on a logged-in computer, including Driver Signature Enforcement. This is my preferred method for average users because it’s temporary and disables DSE long enough to install your unofficial driver.
On the next PC restart, the security feature will automatically reactivate and keep your system safe. Use this method when you only need to install one or two drivers.
- Open the Windows 11 Settings.
- Go to System, then click Recovery.
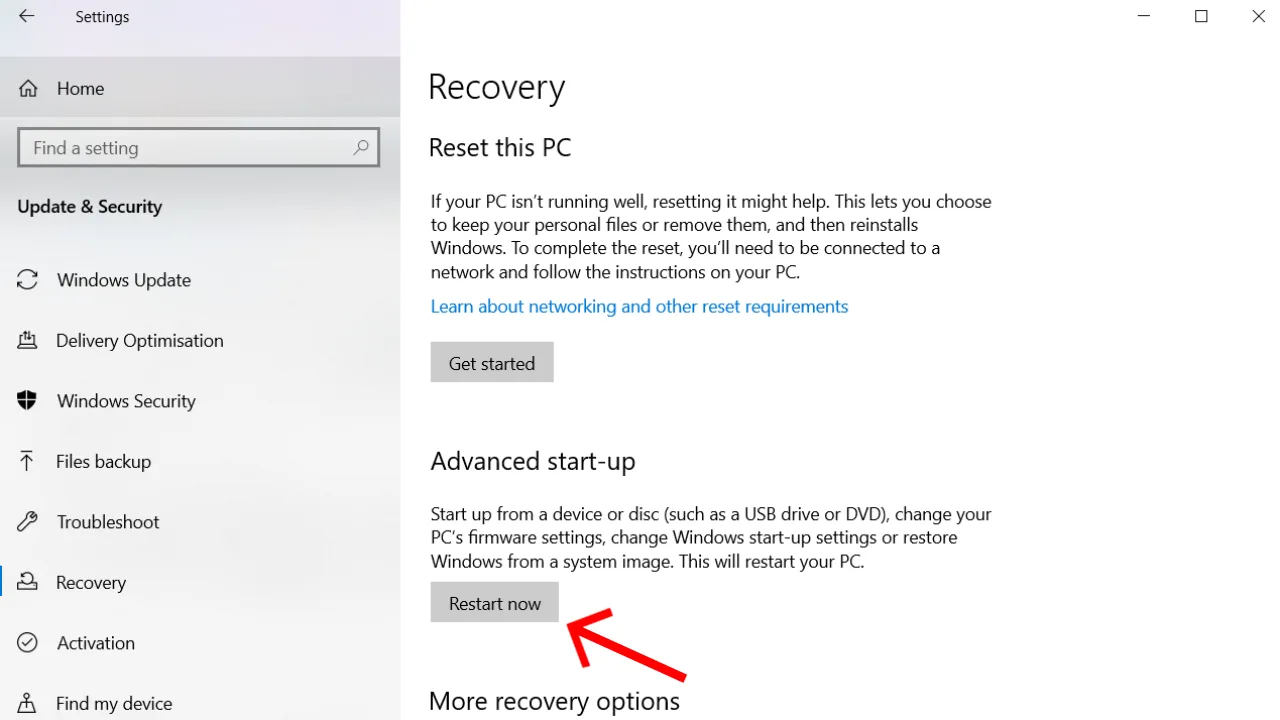
- Next, click the Restart now button next to Advanced start-up.
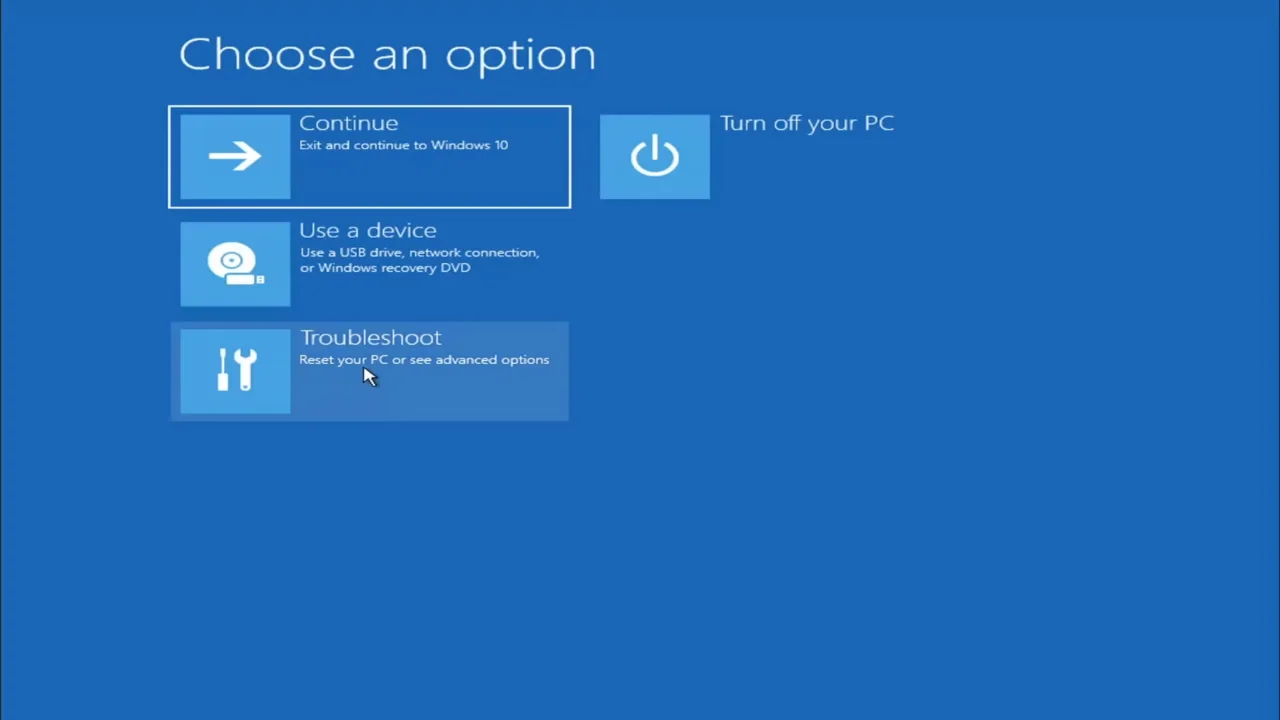
- Your PC will boot into the WinRE. Once the display loads, select Troubleshoot.
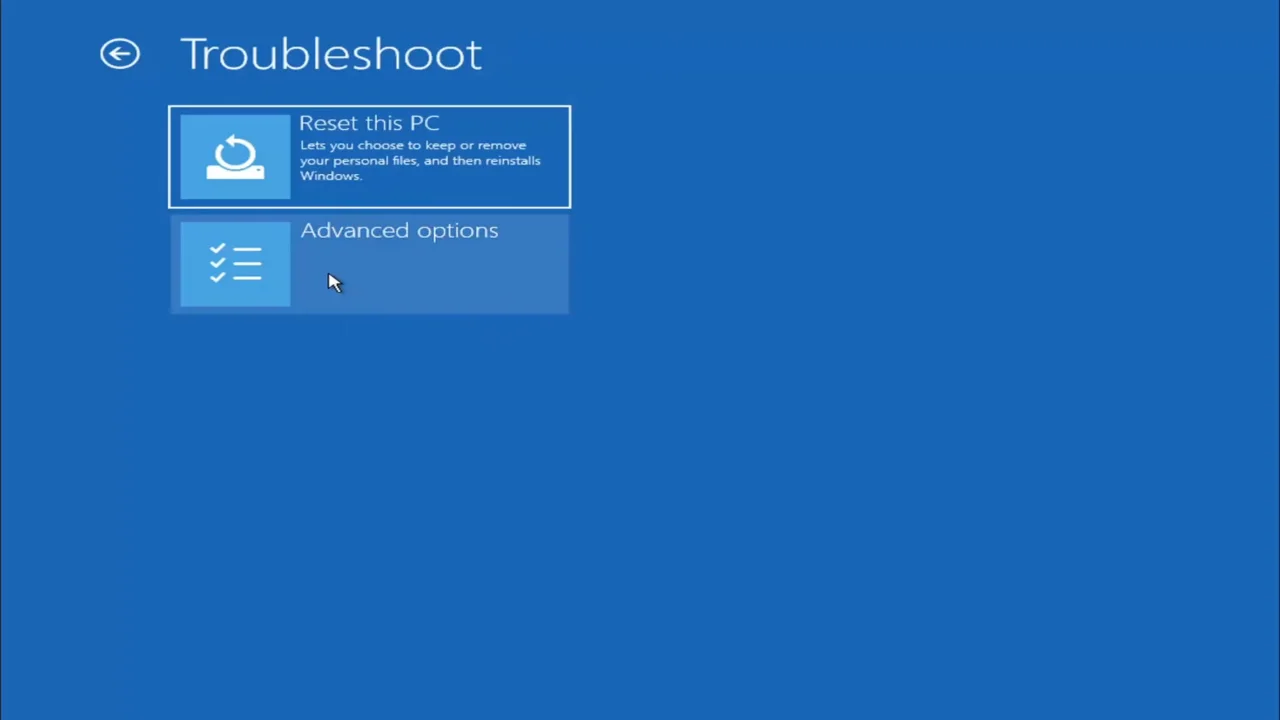
- Click Advanced options.
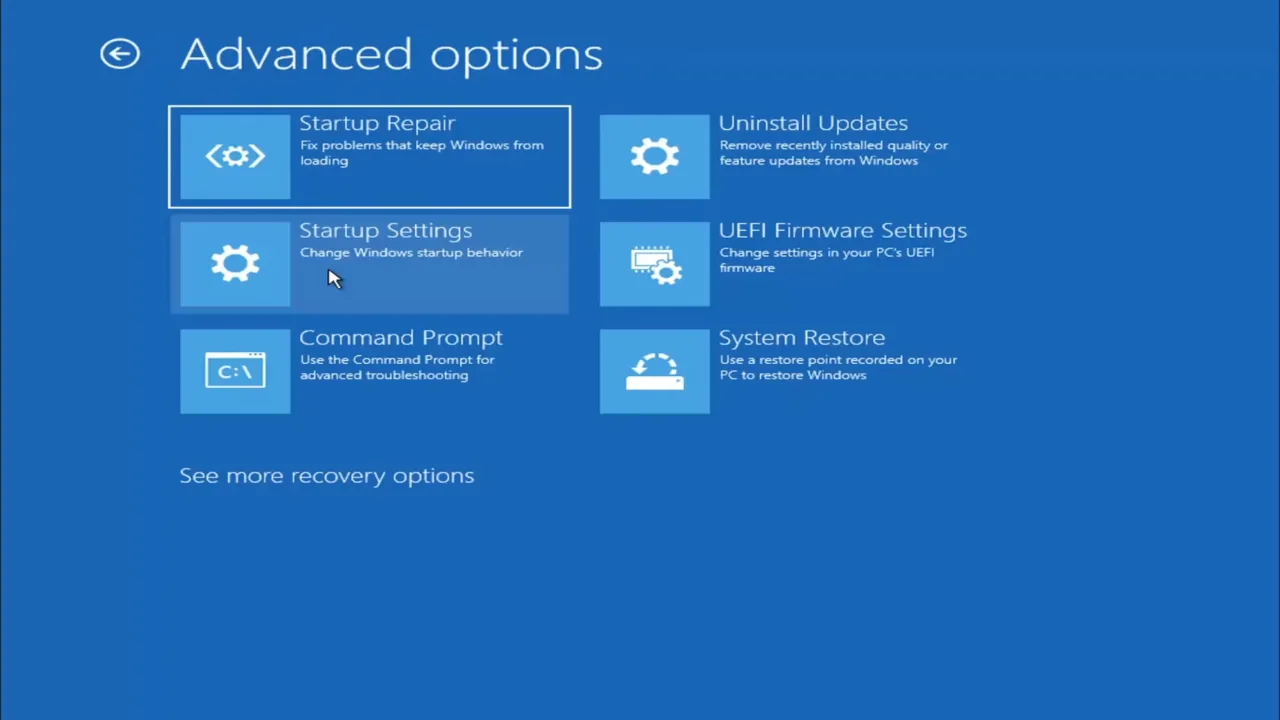
- Select Startup Settings, then click Restart.
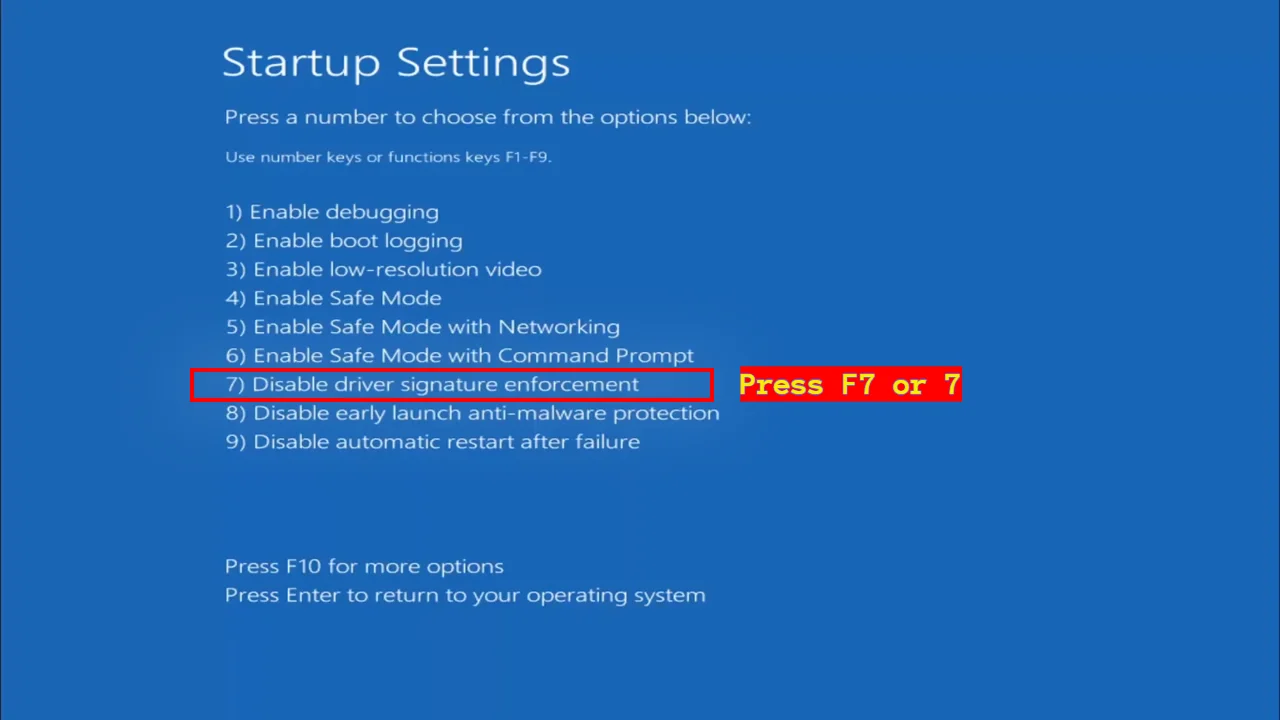
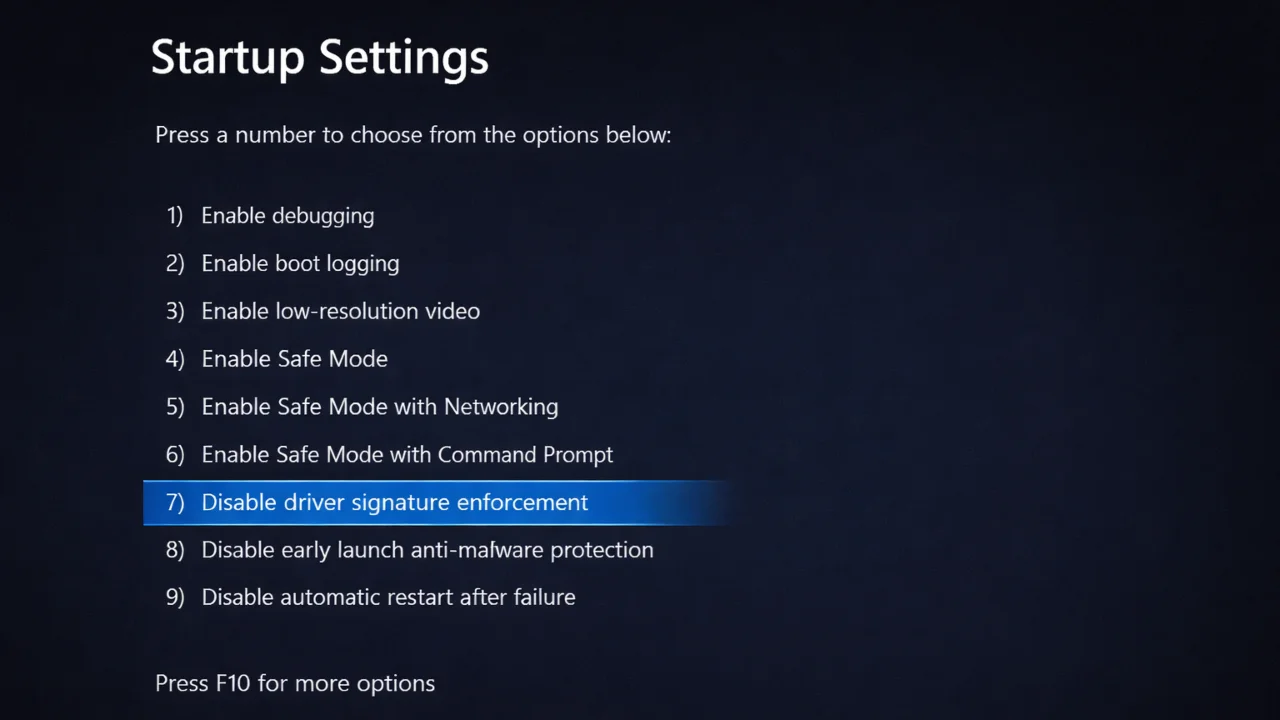
- When Windows 11 boots again, you will see the Startup Settings screen with a list of options. Press F7 or the 7 on your keyboard to choose Disable driver signature enforcement.
Your Windows 11 PC will restart with DSE turned off for that session. Install whatever driver you want, and after the next reboot, everything will go back to normal. If you need to install another unsigned driver later, repeat these steps.
Method 2: Turn Off Driver Signature Enforcement via Command Prompt
If you are a developer, a hardware tester, or have specific gaming setups that require an unsigned driver to be active all the time, you’ll want to disable Driver Signature Enforcement permanently, and this can be done with Command Prompt. Remember, Secure Boot in BIOS must be turned off for this to work. It will keep the setting across reboots until you manually re-enable it.
- Click the Start menu, type cmd, right-click Command Prompt, and select Run as administrator.
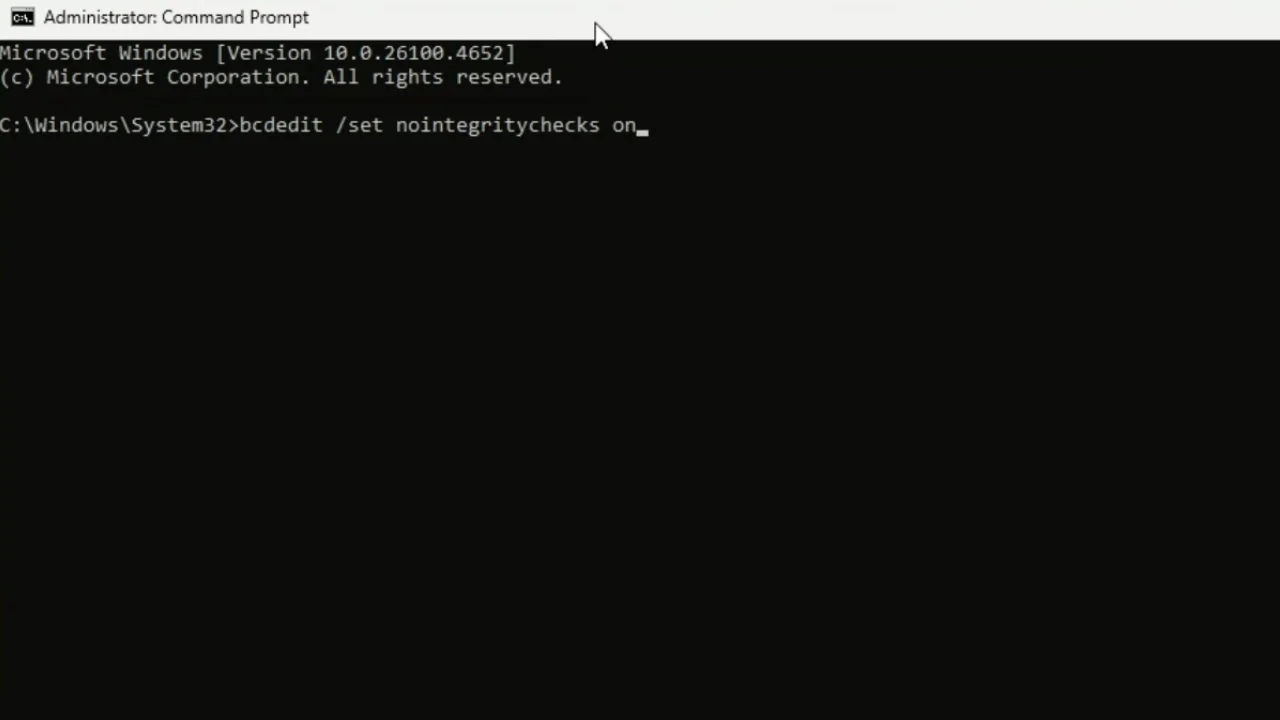
- Type this command and hit Enter:
bcdedit /set nointegritychecks on - You’ll see “The operation completed successfully” if it worked. Restart the computer to apply the change.
- To verify it’s disabled, open Command Prompt as admin again and type
bcdedit. Check the Windows Boot Loader section, where you should seenointegritychecksset to Yes. It means you have now received a free pass to install as many unsigned drivers as you want on your PC.
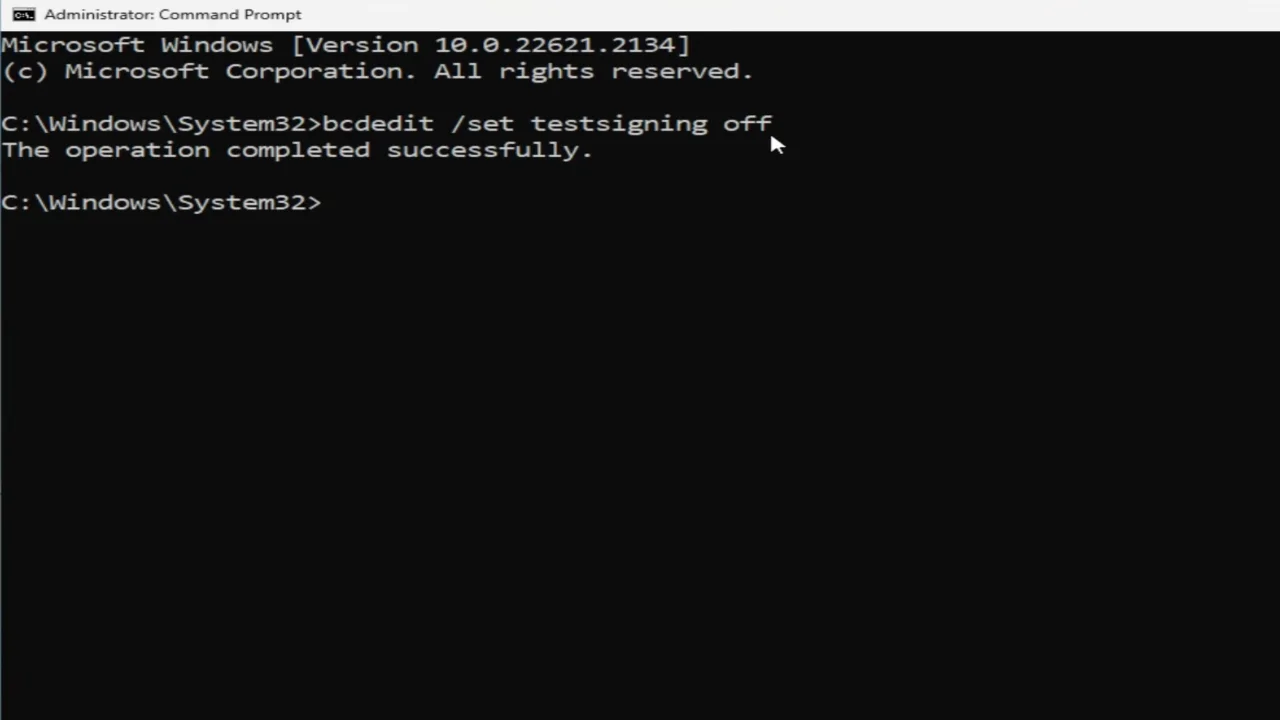
Alternatively, you can force Windows into Test Mode, which achieves the same result but places a small watermark on the desktop. Enter this command: bcdedit /set testsigning on.
Read: How to Change Your DNS Server on Windows and Mac
Method 3: Disable DSE on Windows 11 from Advanced Boot Options
This classic method can be hard to use on modern PCs with fast NVMe SSDs, but it’s a valid way to ignore Driver Signature Enforcement for one session.
- Completely shut down the computer.
- Press the power button to power it on, then immediately tap F8 repeatedly before the Windows logo appears. If you’ve reached the logo screen, you missed it and must try again.
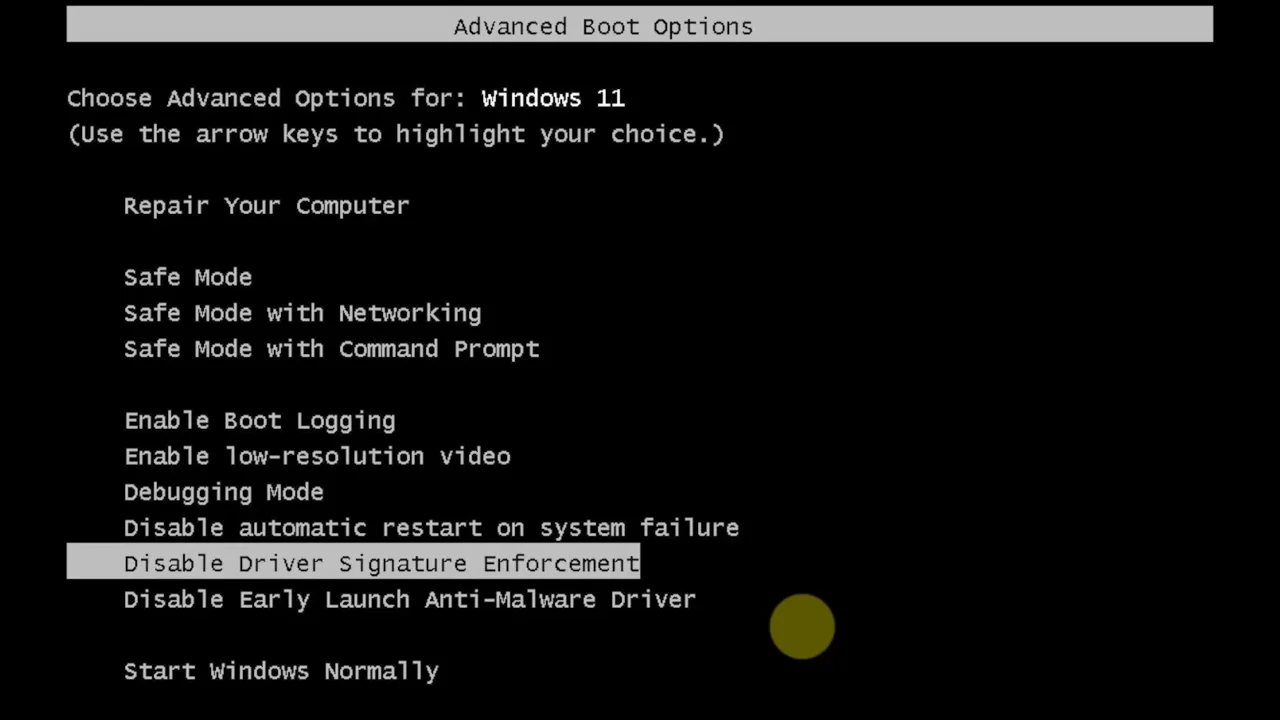
- If timed correctly, you will intercept the boot sequence and open the Advanced Boot Options screen (a black screen with white text).
- Use the arrow keys to highlight Disable Driver Signature Enforcement and press Enter.
Windows 11 will boot with DSE disabled for that session. Same as method 1, the setting will reset to the default when you reboot.
Note: On some modern PCs with fast boot enabled, the F8 window is extremely short. If you miss it always, disable Fast Startup in Windows first, or use method 1 instead. Some new systems also have F8 disabled by default and need you to enable it first in BIOS settings.
Method 4: Disable Driver Signature Enforcement using Group Policy Editor
Windows 11 Home doesn’t include Group Policy Editor, so this solution only works for Windows 11 Pro, Enterprise, or Education editions. It will give you granular control over how Windows treats unsigned drivers and is particularly useful in enterprise environments where you need to apply this same setting to multiple machines.
- Press the Windows Key + R to open the Run dialog box.
- Type
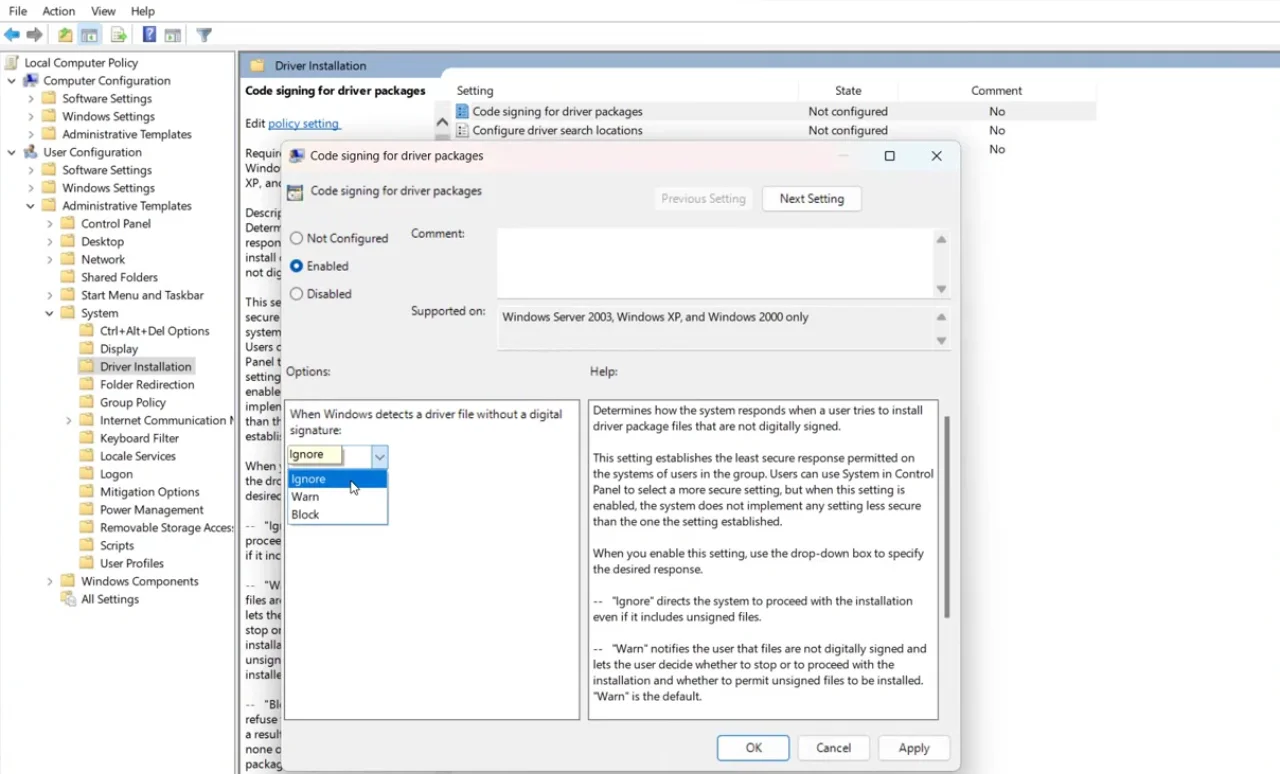
gpedit.msc, and hit Enter to open the Local Group Policy Editor. - Go to this path: User Configuration > Administrative Templates > System > Driver Installation.
- In the right end pane, double-click the policy named Code Signing for Device Drivers (or Driver Packages).
- Change the configuration toggle to Enabled.
- In the bottom Options section, where it says “When Windows detects a driver file without a digital signature,” choose Ignore from the dropdown.
- Click Apply, then OK.
- Restart the PC for the policy to take effect.
When set to Ignore, Windows will install unsigned drivers without prompts or warnings. Other options include Warn, the default setting that asks for confirmation, and Block, which completely refuses the installation. For business networks, you can apply this policy across all domain-joined computers using Active Directory.
How to Enable Group Policy Editor on Windows 11 Home
Windows 11 Home doesn’t ship with the Group Policy Editor, but you can add it manually in the OS. Here’s how:
- Create a new text document anywhere on your computer.
- Paste the following script into it:
@echo off
pushd "%~dp0"
dir /b C:\Windows\servicing\Packages\Microsoft-Windows-GroupPolicy-ClientExtensions-Package~3*.mum >List.txt
dir /b C:\Windows\servicing\Packages\Microsoft-Windows-GroupPolicy-ClientTools-Package~3*.mum >>List.txt
for /f %%i in ('findstr /i . List.txt 2^>nul') do dism /online /norestart /add-package:"C:\Windows\servicing\Packages\%%i"
Pause
- Go to File > Save As, change the Save as type to All Files, and name the file something like
install-gpedit.cmd. - Right-click the saved file and select Run as administrator.
- Wait for the process to complete.
After it finishes, you can open the Group Policy Editor by running gpedit.msc from the Run dialog and follow the steps in method 4.
Read: How to Remove Chat from Taskbar in Windows 11
How to Re-Enable Driver Signature Enforcement
Whichever method you used, here’s how to enable DSE on Windows 11 once again:
- CMD (testsigning): Open Command Prompt as an administrator, run
bcdedit /set testsigning off, and restart your system. - CMD (nointegritychecks): Whenever you want to restore the operating system’s security, open CMD as admin again and swap the “on” for “off” in the command like this:
bcdedit /set nointegritychecks offand reboot. - Group Policy: Open GPO editor, go back to the same policy setting, and set Code Signing for Driver Packages back to Not Configured, and restart.
- Startup Settings / F8: Windows automatically re-enables Driver Signature Enforcement the next time you boot the system — no action needed.
If you disabled Secure Boot to use the CMD, enter the BIOS and turn it back on. Leaving Secure Boot disabled increases the system’s vulnerability to boot-level malware.