

- Security Vulnerabilities of Standard DNS
- How to Enable Private DNS Mode on Android
- Stock Android (Pixel, Android One, most non-Samsung devices)
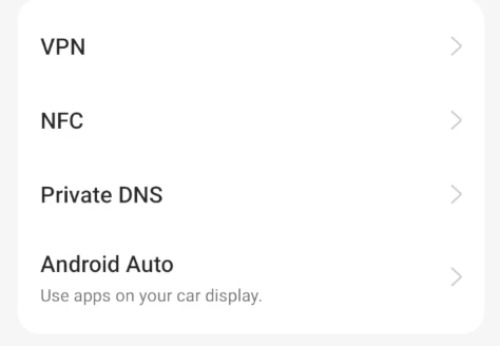
- Samsung Galaxy (One UI)
- Which DNS Provider Should You Use?
- Critical Caveat: Public Wi-Fi and Captive Portals
- Resolve Captive Portal Failures
- Private DNS vs. VPN: What’s the Difference?
- Frequently Asked Questions
- Does Private DNS slow down my internet?
- Does Private DNS work on mobile data, not just Wi-Fi?
- Will Private DNS stop the ISP from tracking my online activity?
- Will a custom Private DNS drain your phone’s battery?
- What happens when the DNS provider goes offline?
Every time you open an app, stream media, or type a web address, your Android phone makes a DNS lookup, a request that translates a domain name like google.com into a machine-readable IP address (74.125.21.102) your device can connect to. By default, these requests are unencrypted, exposing your visited sites to anyone on the same network.
Android’s Private DNS mode encrypts queries via DNS over TLS (DoT), a standardized protocol defined in RFC 7858, so lookups are protected from ISPs, network administrators, and eavesdroppers on a shared Wi-Fi. According to an architectural security study by researchers at the University of California, Irvine, implementing encrypted DoT protocols successfully safeguards users against traditional localized tracking, DNS spoofing, and eavesdropping.
This guide explains how to enable private DNS on Android to safeguard your connection against network interception and structural vulnerabilities, including which DNS provider to choose, and what it does and doesn’t protect.
Related: How to Check If My Phone is Hacked and What to Do Next
Security Vulnerabilities of Standard DNS
Unencrypted DNS queries are transmitted across the network in plain text over port 53. This architecture exposes your internet activity to multiple security threats and attack vectors:
- Eavesdropping and Data Logging: ISPs, local network admins, and malicious actors on shared public Wi-Fi can capture and log your domain requests, compiling a history of your browsing habits.
- DNS Spoofing (Cache Poisoning): Attackers can intercept or hijack unencrypted queries and return fraudulent IP addresses. They redirect you to phishing sites meant to steal credentials or infect your device with malware.
- Man-in-the-Middle (MITM) Exploits: Unsecured connections let intermediaries inject ads, manipulate web traffic, or enforce localized censorship.
How Private DNS Resolves these Vulnerabilities: Android Private DNS feature wraps standard DNS queries in a secure Transport Layer Security (TLS) cryptographic wrapper. All communication between your smartphone and the DNS resolver is encrypted; third parties cannot easily see or manipulate your data without strong attacks.
How to Enable Private DNS Mode on Android
Android handles Private DNS systematically across the operating system, but menu structures vary by original equipment manufacturer (OEM). Find the step sequence according to your specific device settings.
Stock Android (Pixel, Android One, most non-Samsung devices)
- Open the Settings app.
- Tap Network & internet.
- Tap Advanced (on some versions, Private DNS is available directly in network settings).
- Tap Private DNS.
- Select the radio button labeled Private DNS provider hostname.
- Enter the hostname of your chosen provider (see the table below).
- Tap Save.
Samsung Galaxy (One UI)
- Open the Settings app.
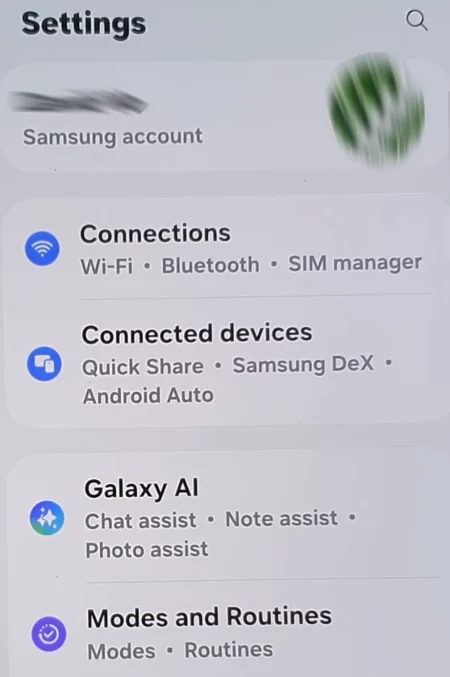
- Tap Connections.
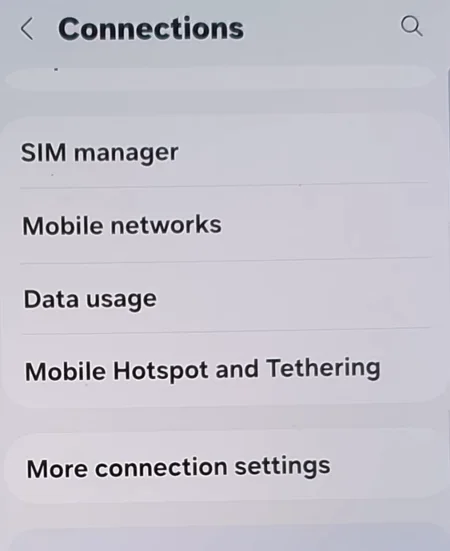
- Select More connection settings located near the bottom of the menu hierarchy.
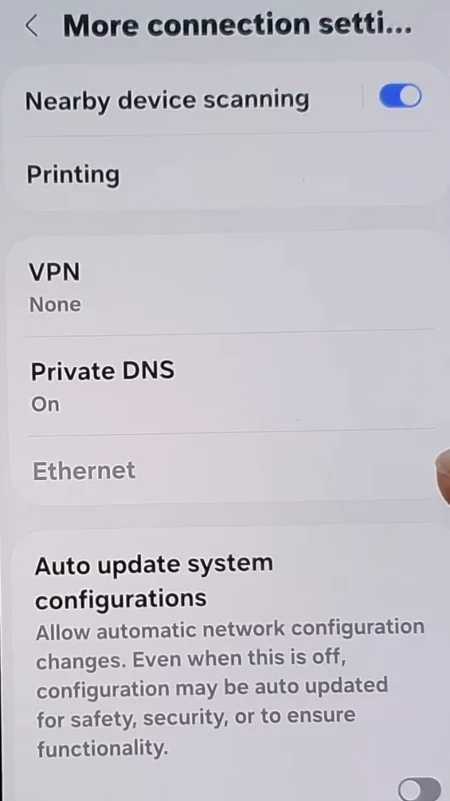
- Tap Private DNS.
- Select Private DNS provider hostname.
- Enter the verified secure DNS hostname into the text field.
- Tap Save.
For OEM menus that differ from what’s listed above, type “Private DNS” in the search bar at the top of the Settings menu to go straight to the right section.
Related: How to Do a Factory Reset on Android
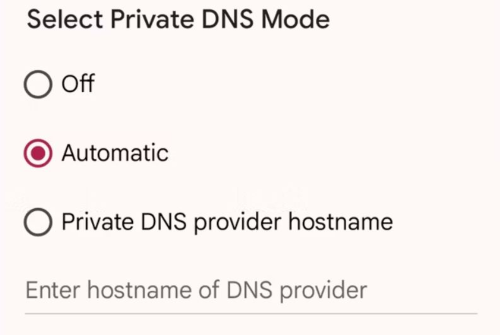
On the Private DNS screen, you will see three choices:
| Option | What it does |
|---|---|
| Off | Disables encrypted DNS. Your queries are sent in plain text through the carrier or router’s default server. |
| Automatic | Attempts to use DoT with your current network’s DNS server if it supports encryption; otherwise, it falls back to unencrypted DNS. |
| Private DNS provider hostname | Sends all DNS queries to the provider you choose, always over an encrypted DoT connection. |
Recommendation: Use custom hostname and enter a trusted resolver. The Automatic mode depends on your ISP supporting DoT, which is not guaranteed.
Which DNS Provider Should You Use?
All of the providers listed below support DNS over TLS and can be used in Android’s Private DNS settings. Use the hostname instead of the IP address.
| Provider | DoT Hostname | Best for |
|---|---|---|
| Cloudflare | 1dot1dot1dot1.cloudflare-dns.com | Optimizes query resolution speeds; enforces strict zero-log user privacy policies; minimal logging. |
| Cloudflare Family | family.cloudflare-dns.com | Blocks malware and adult content. |
| Google Public DNS | dns.google | Offers highly reliable global infrastructure and excellent handling of complex localized content routing. |
| Quad9 | dns.quad9.net | Automatically references threat-intelligence databases to block connections to known malicious domains, phishing networks, and spyware. |
| AdGuard DNS | dns.adguard.com | Blocks ads and analytics trackers at the DNS level. |
| AdGuard DNS Family | dns.adguard-dns.com | Adds adult content filtering. |
| NextDNS | [your-id].dns.nextdns.io | Fully customizable filter; requires an account |
| CleanBrowsing Security | security-filter-dns.cleanbrowsing.org | Malware/phishing blocking only |
OpenDNS (Cisco Umbrella) does support DoT with hostname dns.umbrella.com. However, the free OpenDNS tier logs DNS queries linked to your IP address, so first review their privacy policy.
Critical Caveat: Public Wi-Fi and Captive Portals
When Private DNS is configured to a dedicated hostname, your Android device expects a secure TLS handshake via port 853 for all internet traffic. This creates a direct conflict with captive portals—the web login screens deployed by hotels, airports, and coffee shops to authenticate users. Frequent travelers, in particular, should be aware of this issue, as it can disrupt connectivity during layovers or hotel stays.
Captive portals operate by intercepting your initial network connection and forcing a local DNS redirect to their internal login page. Because your phone is configured to reject any unencrypted or non-validated DNS responses, it blocks this local redirect. As a result, the portal page fails to load, and your device will display a “Connected, no internet” or “Couldn’t connect” error.
Resolve Captive Portal Failures
- Open the device’s Private DNS menu.
- Temporarily switch the option from Private DNS provider hostname to Automatic or Off.
- Open a browser on mobile, visit a basic website to force the captive portal screen render, and complete the required network login or authentication.
- Once your phone establishes a valid internet connection, return to the Private DNS settings and re-enable the custom hostname.
Private DNS vs. VPN: What’s the Difference?
These two tools protect different things and work well together.
| Feature | Private DNS | VPN |
|---|---|---|
| Encrypts DNS lookups | ✅ Yes | ✅ Yes (through the VPN tunnel) |
| Encrypts all web traffic | ❌ No | ✅ Yes |
| Hides your IP from websites | ❌ No | ✅ Yes |
| Requires a third-party app | ❌ No (built into Android) | Usually yes |
| Impacts on battery/speed | Minimal | Moderate |
Private DNS offers lightweight, always-on protection for traffic. VPNs provide broader coverage, but they cost you speed and require users to trust the VPN provider. You can use both, though a VPN usually routes all DNS requests through its own encrypted tunnel. In doing so, it overrides your system’s Private DNS settings whenever the connection is active.
Related: How to Share Location on Android: 7 Easy Methods
Frequently Asked Questions
Does Private DNS slow down my internet?
Rarely. Known providers like Cloudflare and Google maintain low-latency resolvers worldwide. In some cases, switching from your ISP’s DNS to a provider with better infrastructure may even slightly reduce page load times.
Does Private DNS work on mobile data, not just Wi-Fi?
Yes. Android’s Private DNS setting applies to all network connections on the device, including mobile data, unless a VPN app overrides it.
Will Private DNS stop the ISP from tracking my online activity?
It prevents your ISP from reading your DNS queries, which is a primary method for tracking browsing habits. It won’t, however, hide the IP addresses you visit or the volume of traffic you generate. For genuine privacy, stick to HTTPS sites (the padlock icon) and consider a VPN.
Will a custom Private DNS drain your phone’s battery?
No. Private DNS is an integrated, low-level architectural framework built into the Android core. Processing a TLS cryptographic connection for domain lookups takes negligible system resources and has zero measurable impact on battery performance.
What happens when the DNS provider goes offline?
Android won’t revert to unencrypted DNS if you’ve set a specific hostname. It simply fails to resolve the address until the provider can be reached again or you change the setting. Giant companies like Google and Cloudflare have high availability and redundant infrastructure, so outages are rare.
Sources and further reading: Google Developers — DNS over TLS • Cloudflare DNS Privacy Policy • Quad9 Privacy Policy • RFC 7858 — DNS over TLS


