- Do You Know Your Earbuds Type?
- What You Need to Clean Earbuds and Headphones
- Quick Cleaning Safety Table
- How to Clean In-Ear Earbuds
- 1. Remove & Soak Silicone/Foam Tips
- 2. Clean Mesh Grilles
- 3. Wipe Down the Body
- 4. Clean the Charging Case
- How to Clean Over-Ear Headphones
- Foam or Leather Ear Pads
- Headband
- Wired Cable
- What Not to Do While Cleaning Earbuds
- Signs Your Earbuds Need Immediate Cleaning
- How Often Should You Clean Earbuds or Headphones
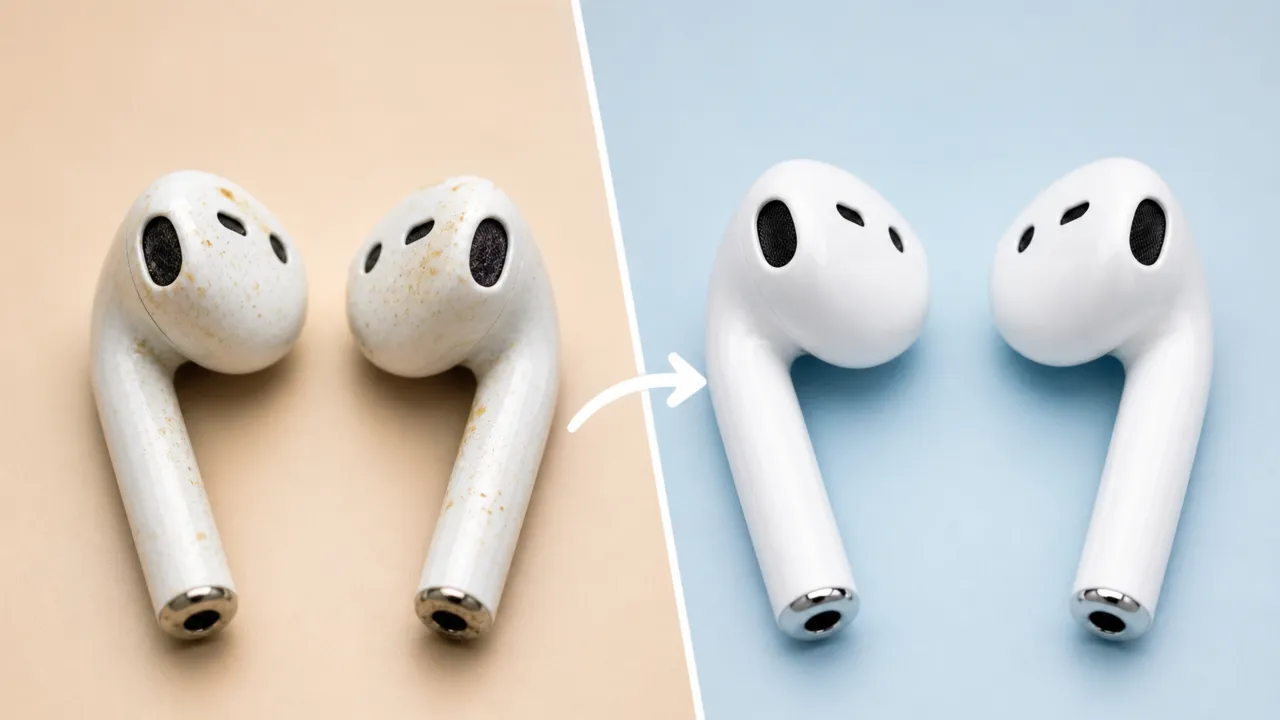
I’ll admit it—I hadn’t cleaned my earbuds for months. When I finally held my daily drivers up to the light and took a close look, the mesh grilles were clogged with yellowish wax, the silicone tips looked smeared and discolored, and inside the charging case, dark gunk clung to the contacts. I was horrified and embarrassed at the same time that I had been putting that filth into my ears every single day.
The reality is worse than the sight. According to a Florida ENT specialist, “headphones are home to about 2,708 times more bacteria than the average cutting board. They have six times more bacteria than a kitchen sink.” A North Carolina State University microbiologist, Michael Taveirne, found Staphylococcus and Pseudomonas on multiple headphone sets he swabbed, both of which can cause infections under the right conditions.
But bacteria alone won’t necessarily make you sick. Problems usually begin when sweat, trapped moisture, impacted wax, and constant adjustments irritate the ear canal over time. Doctors and hearing specialists report a steady uptick in earbud-related issues: infections, tinnitus, and hearing loss caused by the concentrated pressure of prolonged, loud exposure in the ear canal.
We tested AirPods Pro, silicone-tip wireless earbuds, wired earbuds, and over-ear Sony headphones over several months of daily use. Different materials react differently to moisture, alcohol, and friction, so the cleaning methods we’ve discussed below vary based on the earbuds or headphone type.
Beyond the gross-out factor, poor hygiene impacts listening experience. Debris physically clogs the fine acoustic grilles, causing muffled audio, uneven volume, and blocked sound channels. Don’t worry, restoring earbuds or headphones to a clean state takes maybe ten minutes using only what you already have at home. The grime is avoidable. You have to look at it.
Also: Can You Connect AirPods to PS4? If Yes, Then How
Do You Know Your Earbuds Type?
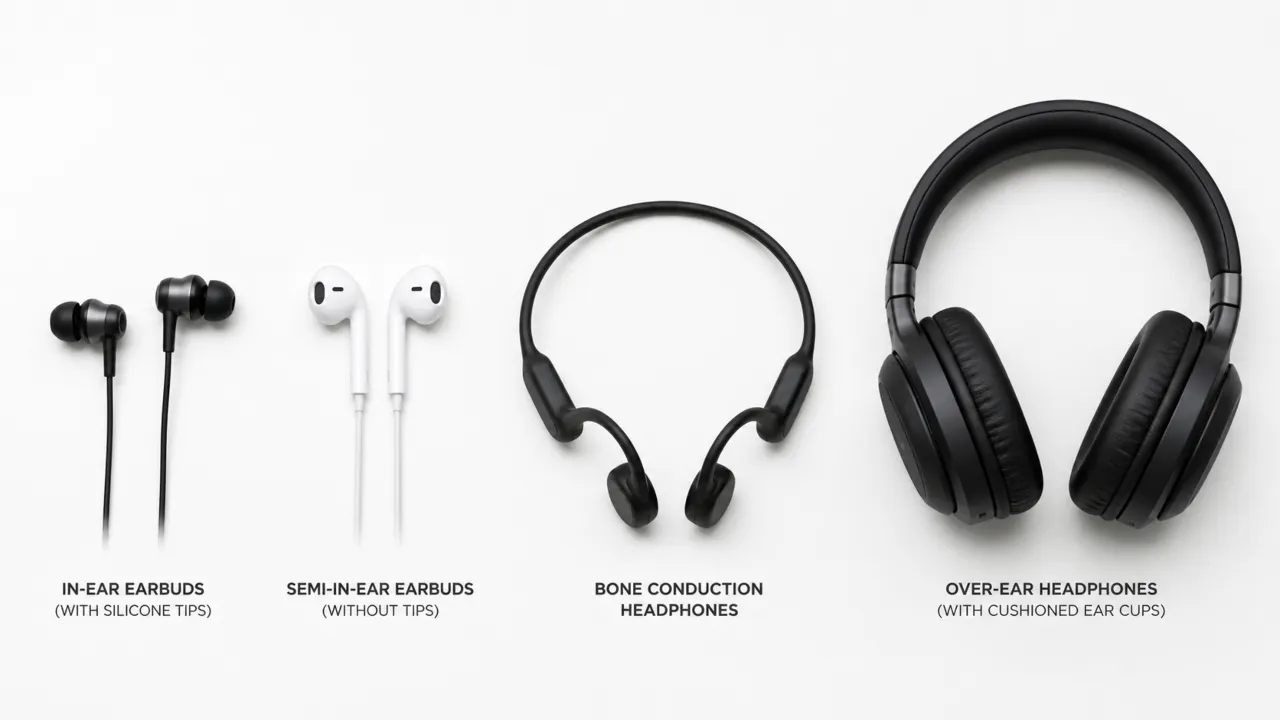
Before you pick a cloth to wipe buds down, figure out exactly what you are about to clean. Earbuds or headphones ship in different designs that need specific methods, and once you know the difference, it will save you a lot of trouble.
- In-ear earbuds (like AirPods Pro, Sony WF series) use silicone or foam tips that sit directly in the ear canal. They collect the most wax and demand the most attention. The mesh grilles over the drivers are particularly prone to impacted buildup that muffles sound over time.
- Semi-in-ear earbuds rest at the entrance of the canal without the extra tips. They have fine metal grilles that trap oil and fine dust particles. It’s fiddly work, but you have to clear that out, as it’s often harder to remove than the chunky wax on other models.
- Open-ear and bone conduction headphones stay outside the ear canal, so wax isn’t really an issue. You’ll mostly encounter sweat on the frame and the occasional oxidation on the charging contacts.
- Over-ear headphones have foam or leather ear cushions that accumulate skin oils, sweat, and dead skin. These should be treated differently than earbuds with plastic shells.
What You Need to Clean Earbuds and Headphones
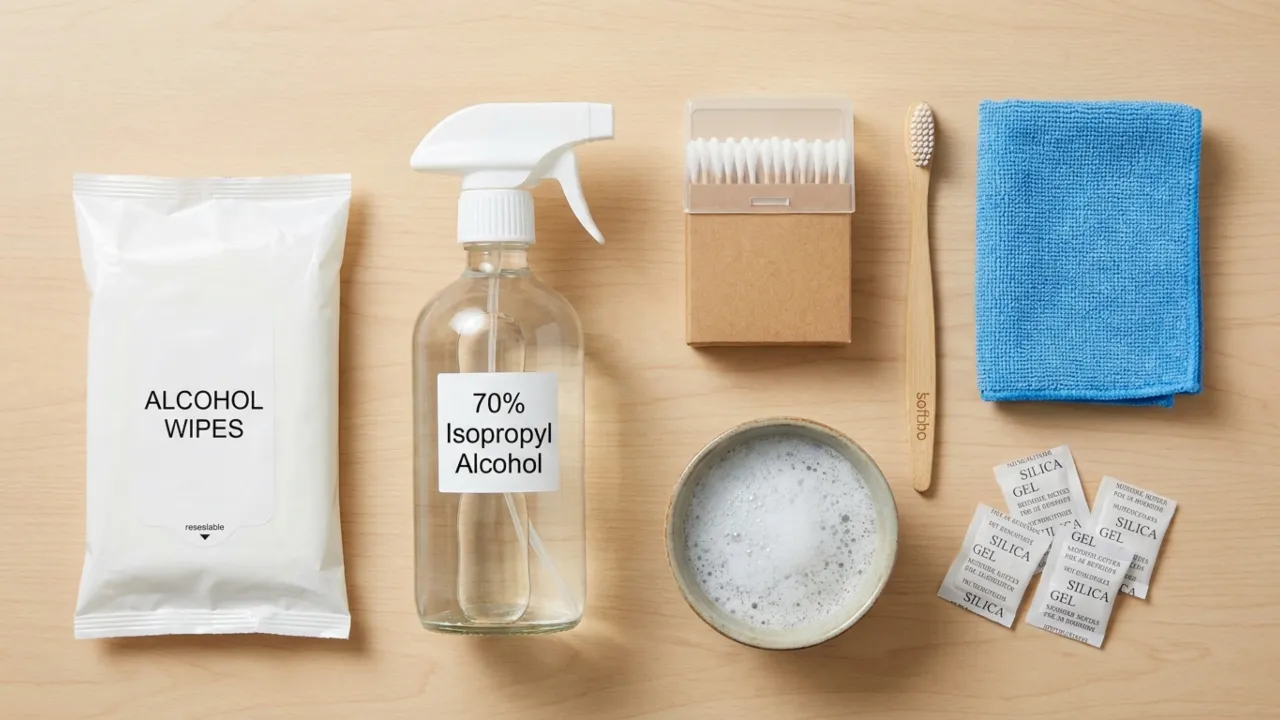
You don’t need expensive tools to clean your earbuds properly. You likely already have everything you need at home.
- Alcohol-free disinfectant wipes. Safe on silicone, rubber, and plastic because they won’t strip off any coatings. These are the everyday workhorses for surface cleaning.
- 70% isopropyl alcohol wipes. More powerful for disinfection, but use carefully and sparingly. Avoid prolonged contact with foam or rubber, as it can degrade the materials over time.
- Soft-bristle brush. An old toothbrush does the job, though a precision brush from tech kits is even better for fine grilles as it reaches deep into the crevices.
- Cotton swabs (Q-tips). Required to clean charging ports, case interiors, and tight corners. They reach the narrow gaps where brushes can’t.
- Microfiber cloth. A lens cloth from a glasses case is good to safely remove oils and fingerprints; it won’t scratch and reduces static buildup.
- Mild dish soap and warm water. To soak removable silicone ear tips and clean over-ear cushions.
- Silica gel packets. Keep one in your gym bag with earbuds inside. Once placed next to buds, it absorbs the residual moisture after a gym session before it can reach the internal electronics.
If you own AirPods or AirPods Pro, check Apple’s official cleaning guidance first, as they advise against soaking or spraying liquids directly on the earbuds.
You might have heard that isopropyl alcohol can be used for cleaning, but be careful. It strips the finish right off delicate surfaces. If you must use it, mix the solution with water first. Apply a small amount to a lint-free cloth instead of dabbing it directly onto the item.
Also: AirPods Microphone Not Working? Here’s How to Fix
Quick Cleaning Safety Table
| Part | Safe Cleaner | Avoid |
|---|---|---|
| Silicone Ear Tips | Warm soapy water | Bleach or boiling water |
| Foam Ear Tips | Damp microfiber cloth | Soaking in water |
| Charging Contacts | 70% alcohol swab | Metal tools |
| Leather Ear Pads | Mild soap + damp cloth | Alcohol wipes |
| Speaker Mesh | Soft brush + dry swab | Pins or needles |
How to Clean In-Ear Earbuds
Whether you have premium wireless earbuds or budget wired models, you need to be careful getting the grime out. The process stays mostly the same, but you need patience and to avoid excessive moisture.
1. Remove & Soak Silicone/Foam Tips
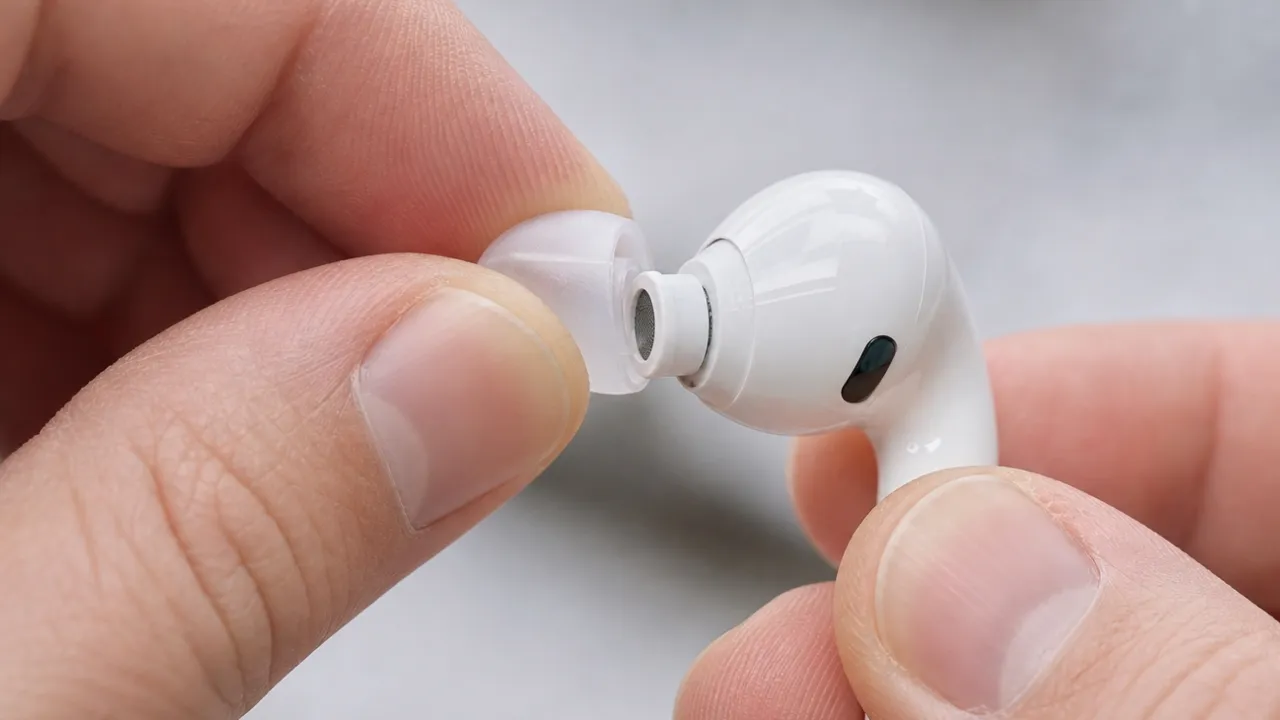
Remove the removable silicone ear tips and drop them into a bowl of warm, soapy water to soak for at least 30 minutes. If they feel greasy afterward, gently rub them between your fingers under clean water. Make sure the soap doesn’t have any moisturizers, which can leave a film.
Silicone parts must completely dry before you reattach them. Wet tips are a common way for moisture to enter the driver housing. If you have foam tips, don’t soak them. Water will degrade the foam and damage the seal, so only wipe them with a barely damp cloth.
2. Clean Mesh Grilles
Hold the earbud so the speaker mesh points down; gravity will help pull loose debris away from the internal driver. Pick a soft brush and flick it across the mesh in short strokes to sweep wax and debris off the mesh surface. No need to press hard; the bristles will do the work.
For stubborn impacted wax, use a slightly damp cotton swab to gently loosen it, then brush it off. For final disinfecting, use a swab with a small amount of 70% isopropyl alcohol and wipe the mesh. Next, let it air dry before putting the earbud back together.
3. Wipe Down the Body
Use an alcohol-free disinfectant wipe or microfiber cloth to clean the outer plastic shell, stems, buttons, and touch controls.
Pay close attention to seams and corners because sweat and skin oils collect there surprisingly fast. For hard-to-reach spots, use a dry Q-tip to remove any leftover grime.
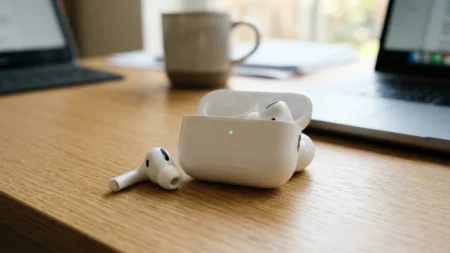
4. Clean the Charging Case
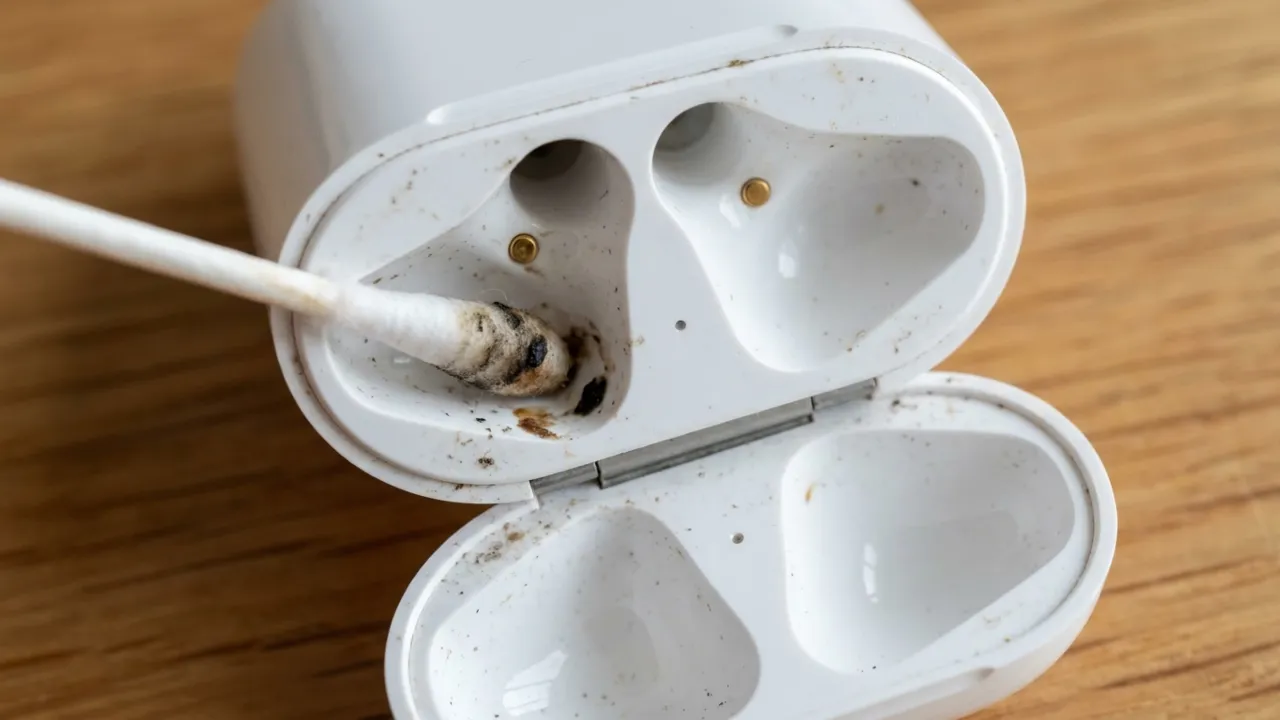
You’ve done all that work, don’t dump the buds into a dirty case. Putting clean earbuds in a filthy case will make them dirty again.
Use a dry cotton swab to clean the inside of the case on the earbud placement spots and the charging contacts. If the gold pins look dull or have dark spots, a small amount of isopropyl alcohol on a swab will bring the shine back and keep the connection solid.
Wipe the outside of the case with a damp cloth or a wipe. To clean lint out of the charging port, carefully use a dry cotton swab or a wooden toothpick. Be sure to steer clear of metal objects, since they can scratch or bend charging pins.
How to Clean Over-Ear Headphones
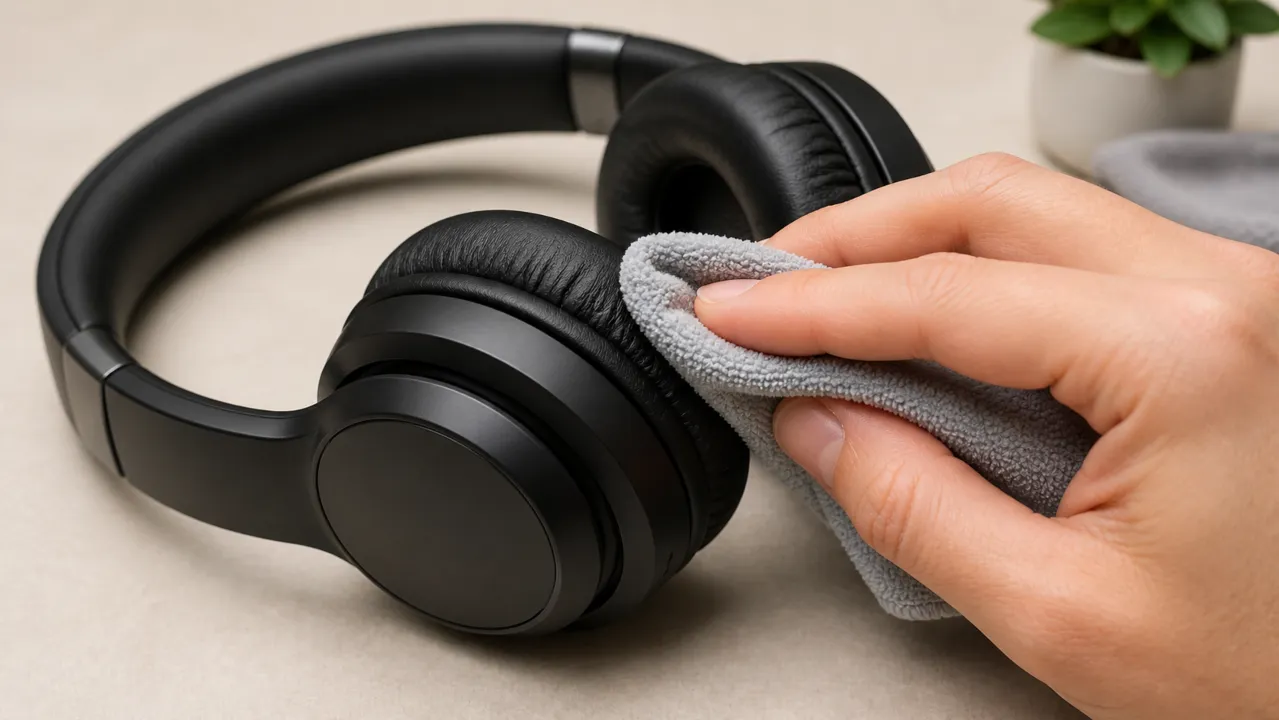
Over-ear headphones collect more sweat and skin oils than people realize, especially around the ear cushions and headband.
Foam or Leather Ear Pads
Never use alcohol on leather or leatherette pads, as it strips the coating and causes them to crack.
Instead, use a cloth slightly dampened with warm water and a drop of mild dish soap. Wipe gently in small circles, then follow with a dry cloth and let the pads air dry completely before the next use.
If your headphones’ foam pads are removable, detach them to scrub gently with soap and a toothbrush. Like the leather ones, make sure they get completely dry.
Headband
Wipe down the headband with a disinfectant wipe or a damp microfiber cloth. Pay special attention to the underside where it contacts your scalp, since that spot collects oil and people often miss it.
Wired Cable
If you have wired headphones, remember that its cable gets in touch with everything from your clothes to dusty tables. Wipe the whole cable down with a damp cloth, from the headphones to the jack. And if you see any dust in the port, a quick swipe with a dry Q-tip will clear it right out.
Also: AirPods Won’t Turn On? Here’s How to Fix
What Not to Do While Cleaning Earbuds
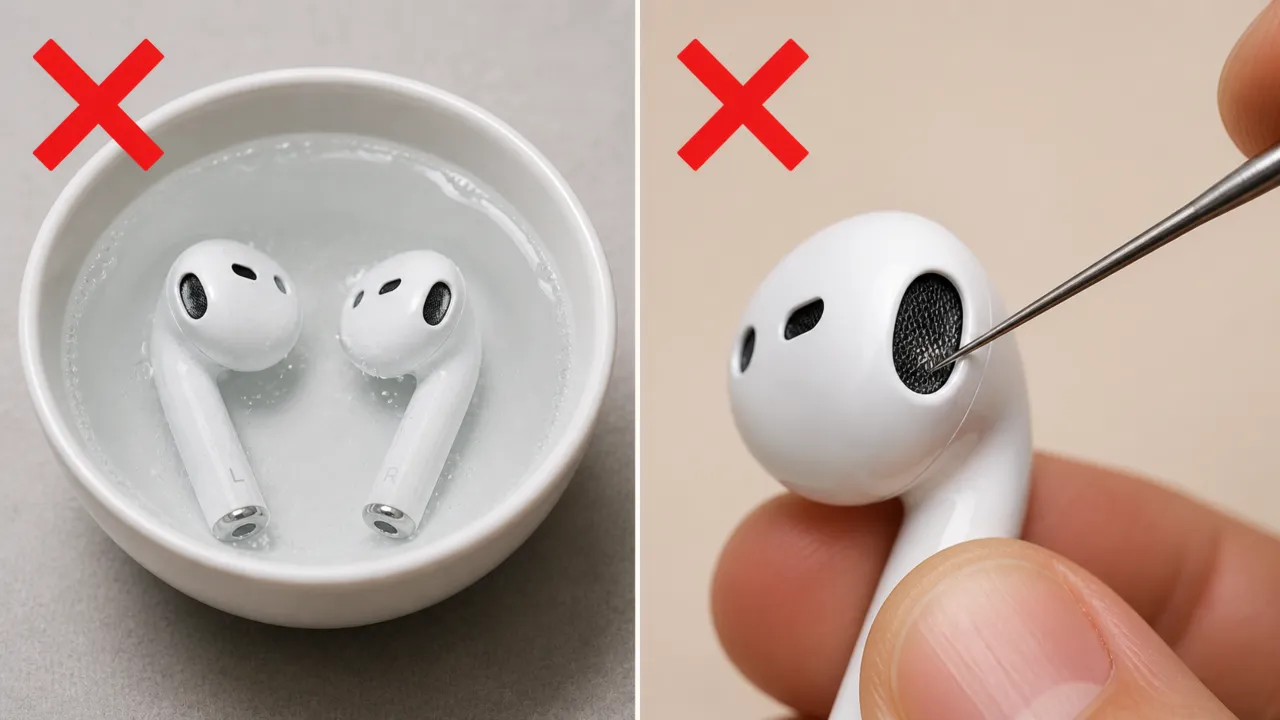
- Never submerge your earbuds or headphones in any liquid. Even devices with IP55 or IP57 ratings are designed for splash resistance, not soaking.
- Do not rinse earbuds under a faucet. Running water directly over earbuds forces water past seals that casual splashes would never breach.
- Don’t use sharp tools like needles or pins to scrape mesh or bend the contacts. One puncture permanently destroys the acoustic membrane.
- Never charge wet earbuds. Moisture around charging contacts can cause corrosion or electrical damage.
- Skip the hairdryer and heat guns. That kind of heat melts internal adhesives and damages batteries. Air drying takes longer, sure, but it won’t brick your gear. It’s better to let them dry naturally, even if it takes a while.
- Avoid cleaning putty on fine mesh. It leaves sticky residue in the grilles that’s worse than the debris you were trying to remove.
Signs Your Earbuds Need Immediate Cleaning
- One side suddenly sounds quieter than the other.
- Audio becomes muffled or distorted.
- You notice visible yellow or dark buildup on the mesh.
- The earbuds start slipping out constantly.
- The charging case stops charging reliably.
- A bad smell develops around the ear tips.
How Often Should You Clean Earbuds or Headphones
A quick wipe once a week is enough for most people, but gym users and commuters should clean earbuds more often because sweat accelerates buildup. Further, perform a deep clean every 3 months.
One simple habit makes a huge difference: after workouts or humid commutes, wipe away sweat immediately instead of letting it dry on the earbuds. Dried sweat leaves behind mineral residue that becomes much harder to remove later. The simple “sweat‑then‑dry” habit can add years to an earbud’s life.
While you’re at it, take a few minutes to wipe down your phone and laptop screens with that same cloth. Your phone presses against your face all day, and your keyboard picks up everything your hands touch. Think of it as one big hygiene loop. There’s no point in having spotless earbuds if they end up in a dirty phone jack.
This guide covers general earbud and headphone hygiene only. If you experience ear pain, swelling, discharge, dizziness, or hearing problems, stop using the earbuds and contact a qualified healthcare professional.
Clean earbuds or headphones sound better, last longer, and won’t make you cringe when someone asks to borrow them.