

If your N’Erud run starts at Seeker’s Rest, you will go through one of Remnant 2’s most important scavenger hunts. This floating, desolate construct is managed by a friendly(ish) drone called The Custodian. He intends to save the remaining Drzyr by reaching the Core, but the entrance to Sentinel’s Keep is sealed.
To unlock the Sentinel’s Keep, you must find three Seeker’s Keys. The door actually requires five keys total, but luckily for us, two are already in place. In this guide, we’ll show you where to find every Seeker’s Key in Remnant 2 and how to get the required item to fight the world boss, Sha’Hala.
How to Get All Seeker’s Keys in Remnant
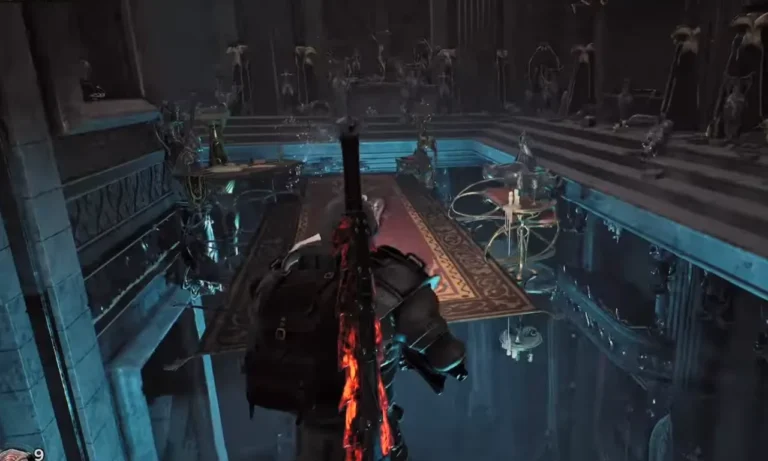
During the Travel to Alepsis story, you’ll meet The Custodian early on, a strange mechanical overseer who wants you to get into Sentinel’s Keep, or the Threshold of the Unknown. The large doors are locked and need the missing keys in the slots, all hidden across N’Erud’s overworlds and dungeons. Two of these keys are locked behind boss fights, so come prepared with powerful gear. The enemies here are not easy to deal with, and the purple-tumored zombies in certain dungeons will wreck you if you’re not careful.

Seeker’s Key #1 Location
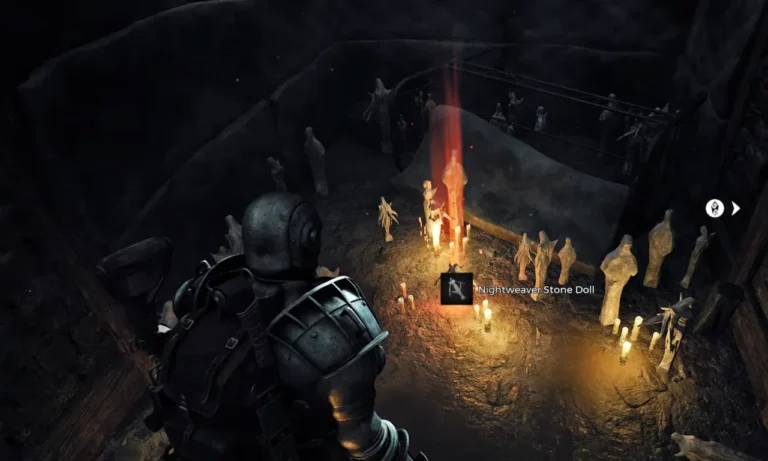
Right when you spawn in N’Erud at Seeker’s Rest (the very first area), walk down the path until you see a big statue in the room. As you get close, the statue’s chest plates will shift, and a staircase will open from the floor. Go upstairs and collect the glowing item from the statue’s chest, the first Seeker’s Key. While there, speak with the drone floating nearby, which is the Custodian’s avatar, and he will give you the details on the quest.
Seeker’s Key #2 Location
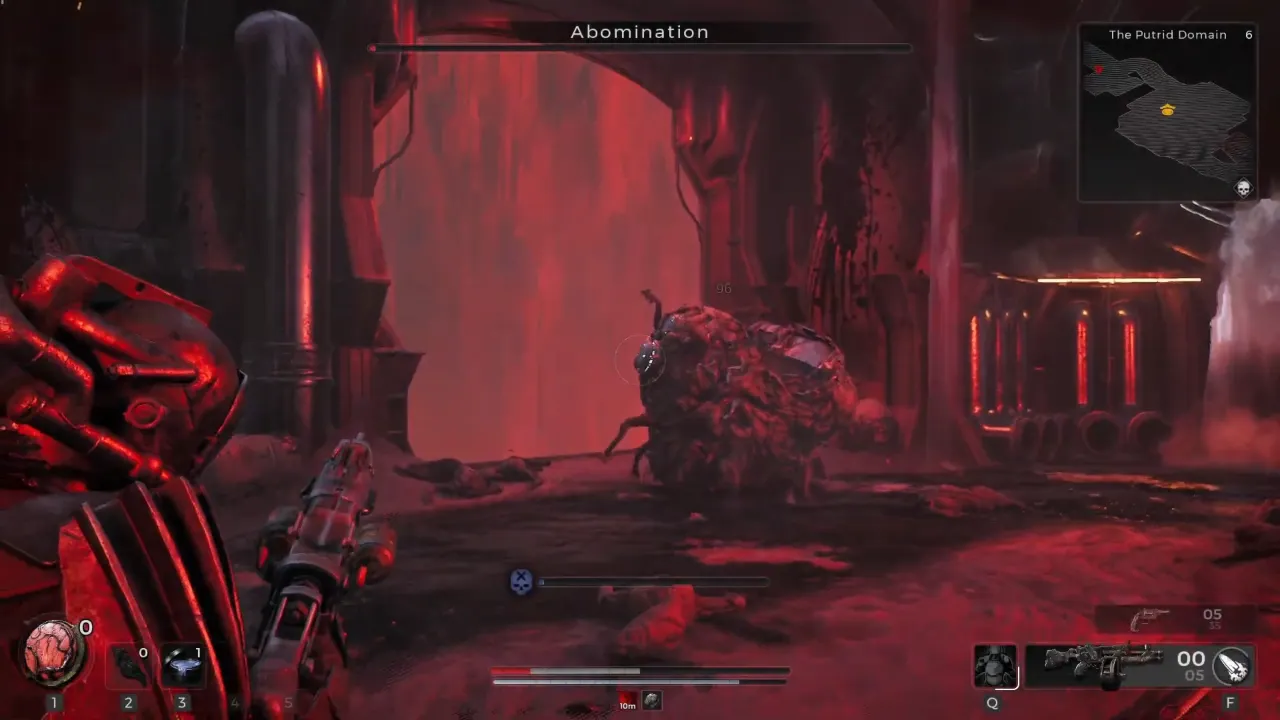
The second key can be found in whichever dungeon connects Phantom Wasteland to the second half of N’Erud. Because of the game’s procedural generation, you’ll get either The Hatchery or The Putrid Domain dungeon. Both spawn in the eastern part of Phantom Wasteland. You will know you are in the right place because you have to fight a mini-boss at the end.
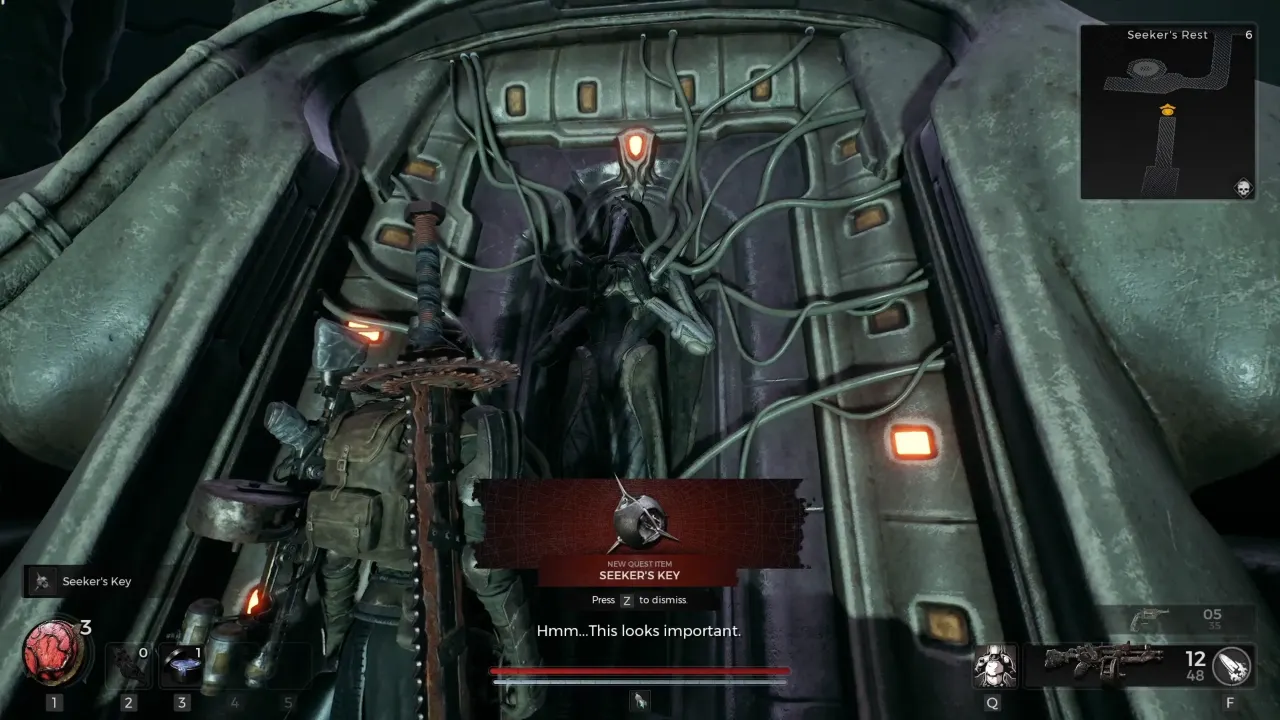
In The Hatchery, you’ll face the Primogenitor (the annoying parasite guy), and in The Putrid Domain, you’ll fight the Abomination. After defeating the boss, look for the exit elevator or a back room. You will find another one of the giant statues. Just like before, the stairs will reveal themselves, and you can get the second Seeker’s Key from the statue at the top.
Note: The Putrid Domain is filled with different enemies like the zombie-like creatures with the purple growths on their chests. You need to shoot the growths for quick kills.
Seeker’s Key #3 Location
You can find the final key in the second area of N’Erud called Timeless Horizon. The zone can’t be reached until you’ve cleared the second key dungeon, since it opens the path through the toxic mist.
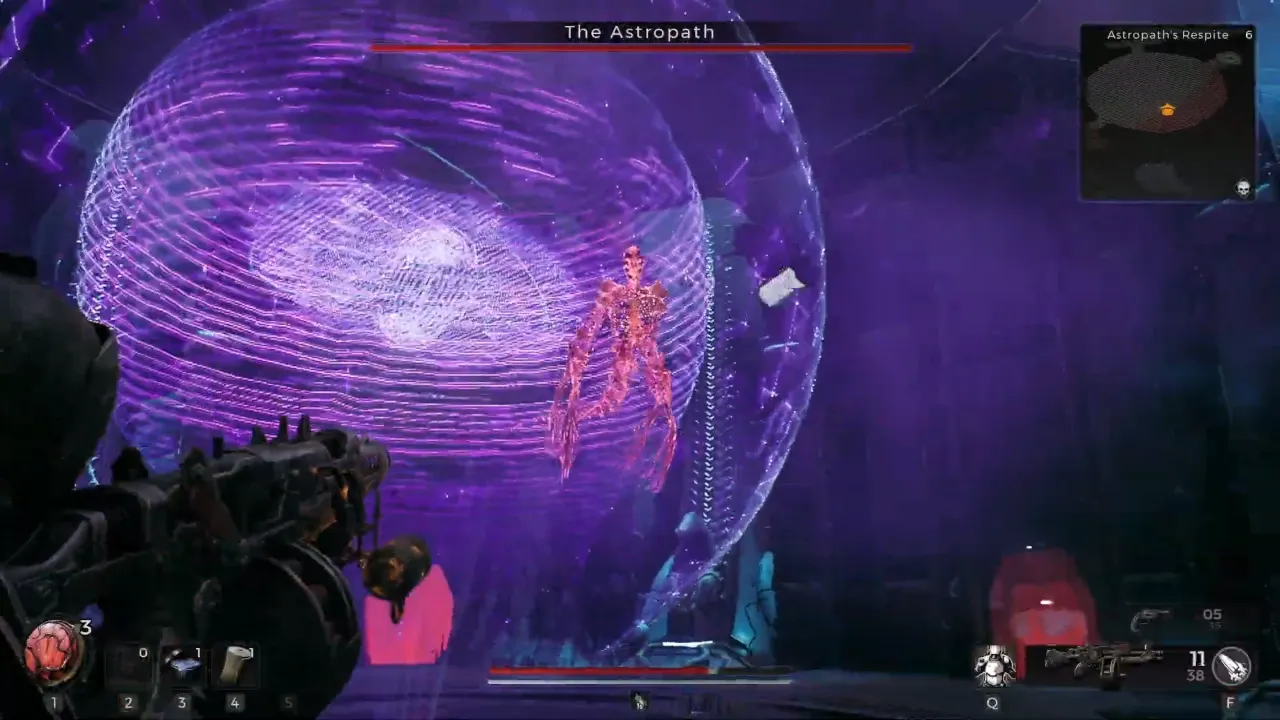
Head north of the map in Timeless Horizon and enter the dungeon, either Spectrum Nexus or Astropath’s Respite. Fight through the dungeon, defeat the boss at the end: Spectrum Nexus features the Custodian’s Eye boss, and Astropath’s Respite has the Astropath to encounter, and then continue to explore further. Just like before, you’ll find another statue with a sealed core. As you approach, the stairs will reveal, and at the top sits the third Seeker’s Key.
With all three keys collected, head back to Phantom Wasteland and return to the massive locked door at the Threshold of the Unknown to insert the remaining keys and get access to Sentinel’s Keep.
- Related: Remnant 2 The Executioner Boss Guide
Sentinel’s Keep Boss Fight
You must obtain the Override Pin to fight Sha’Hala inside Sentinel’s Keep. From the Timeless Horizon checkpoint, head north, where you’ll see a massive, nameless tower with a glowing core on top. Look to the left of it for a short tower with a light beam at the entrance and statues flanking the stairs.
Fight through the enemies inside, then look for a hidden opening or a side path leading to a second elevator. Follow these wind paths down into the guts of the building. At the bottom, you’ll find the Override Pin at the foot of a statue holding a red glowing orb. Take it, return to Sentinel’s Keep, and insert the pin into the device near the arena to trigger the fight with Sha’Hala.
But if you use this pin at the console before the boss fight, things will get very hard, and N’Erud will be permanently destroyed, which means you can’t go back until you reroll your campaign or adventure. Without it, Alepsis-Taura will open up after 24 hours. Make sure you’ve explored everything and grabbed all the loot you can before you trigger that final encounter.


